English
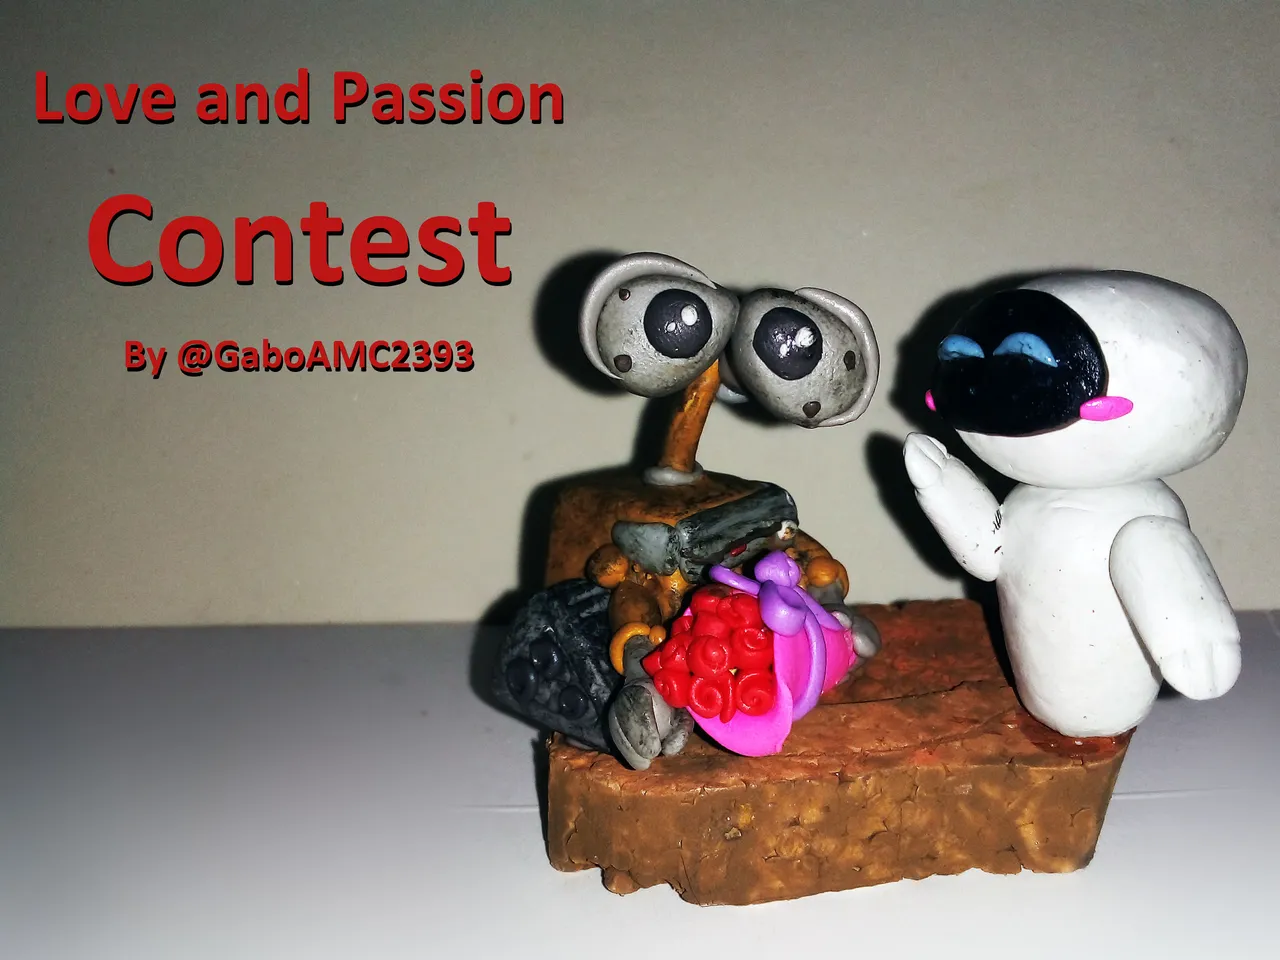
Greetings to all, fellow members. As many of you know, the contest that is active in the community is the Love and Passion contest. A contest in which we are invited to make a publication dedicated to that special person or a friend we have around, where we show a creation with the theme in question, using specific materials.
You can read the publication and its rules by following this link:
@hive-130560/nuevo-concurso-amor-y-pasion-new-contest-love-and-passion-espeng
I was thinking about what to do and I had several options, but considering the theme, I decided on a small diorama of Wall-E and Eva, so I hope you like it.
Español
Saludos a todos, compañeros. Como muchos saben, el concurso que está activo en la comunidad es el de Amor y pasión. Un concurso en el que se nos invita a hacer una publicación dedicada a esa persona especial o a un amig@ que tengamos por allí, donde mostremos una creación con la temática en cuestión, usando materiales específicos.
Pueden leer la publicación y sus reglas siguiendo este enlace:
@hive-130560/nuevo-concurso-amor-y-pasion-new-contest-love-and-passion-espeng
Estuve pensando en qué hacer y tenía varias opciones, pero visto y considerando la temática, me decidí por un pequeño diorama de Wall-E y Eva, así que espero les guste.
Materials:
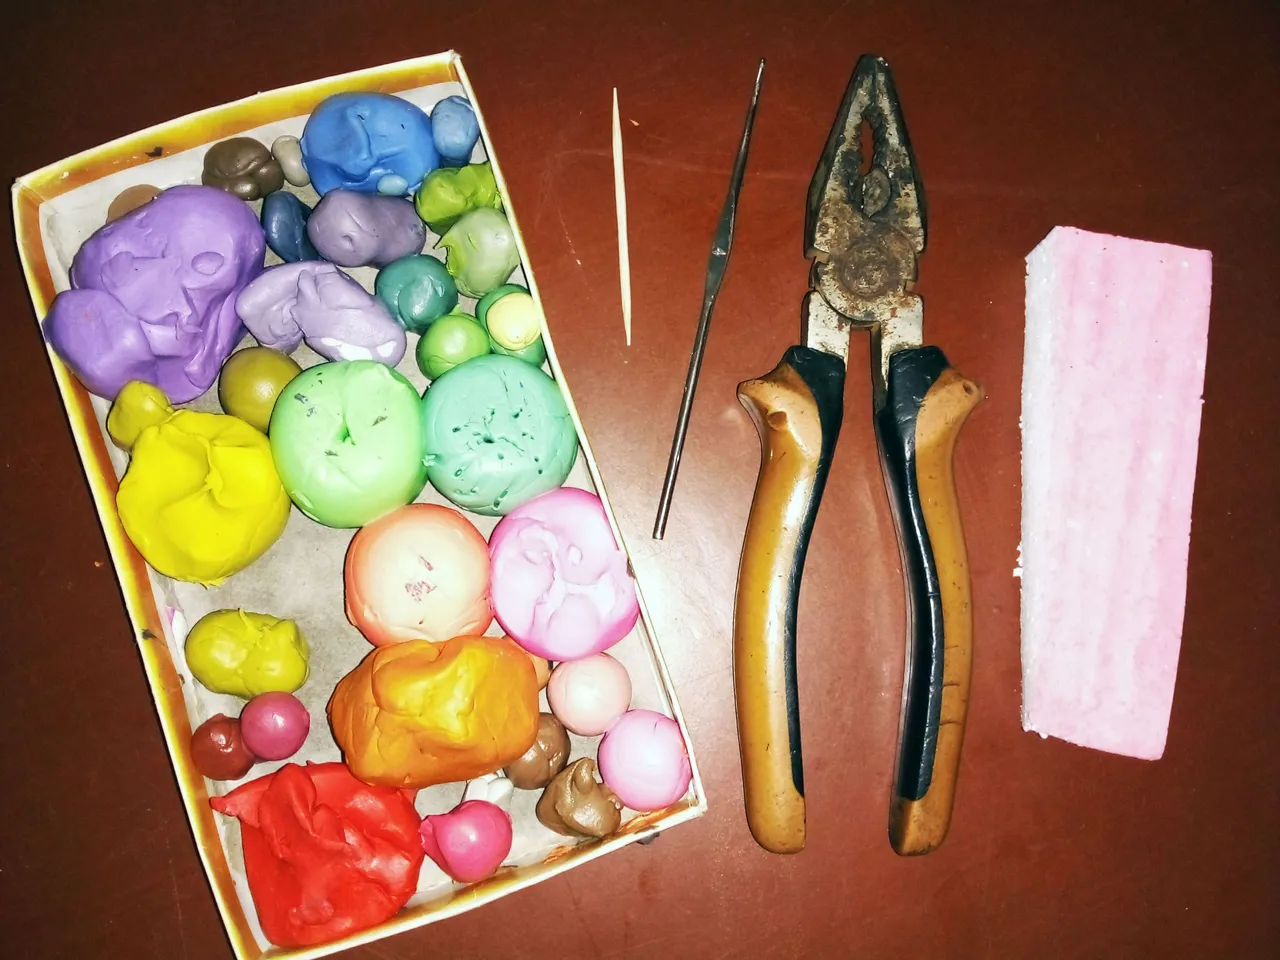
The materials used to make this figurine were as follows:
*Plastilin
*Aluminum wire
*Wooden sticks
*Polystyrene/Anime
*Glue
*Paints
*Tools: blade, scissors, knitting needle, paintbrush, pliers.
Materiales:
Los materiales utilizados para hacer esta figurita fueron los siguientes:
*Plastilina
*Alambre de aluminio
*Palillos de madera
*Poliestireno/Anime
*Pegamento
*Pinturas
*Herramientas: hojilla, tijera, aguja de tejer, pincel, alicate.
Step by step:
Although I do not have close to the person to whom I wanted to give this figure, I made it with the same intention of making it resistant to time so that, in the future, I could give it as a gift.
As it is a somewhat robust figure, because of the shape of the characters, I decided not to make it so heavy using polystyrene or anime as a base, and then use the plasticine to cover and mold this skeleton.
Below you can see the skeleton in pieces and then assembled. I made the thick pieces out of polystyrene and the thin ones out of wire and wooden sticks.
Paso a paso:
Aunque no tengo cerca a la persona a la que quería regalar esta figura, la hice con la misma intención de que fuese resistente al tiempo para, en un futuro, poder obsequiarsela.
Como es una figura un poco robusta, por la forma de los personajes, decidí no hacerla tan pesada usando poliestireno o anime como base, para luego usar la plastilina para cubrir y moldear este esqueleto.
A continuación pueden ver el esqueleto por piezas y luego ya armado. Las piezas gruesas las hice de poliestireno y las delgadas de alambre y palillos de madera.
 |  |
|---|
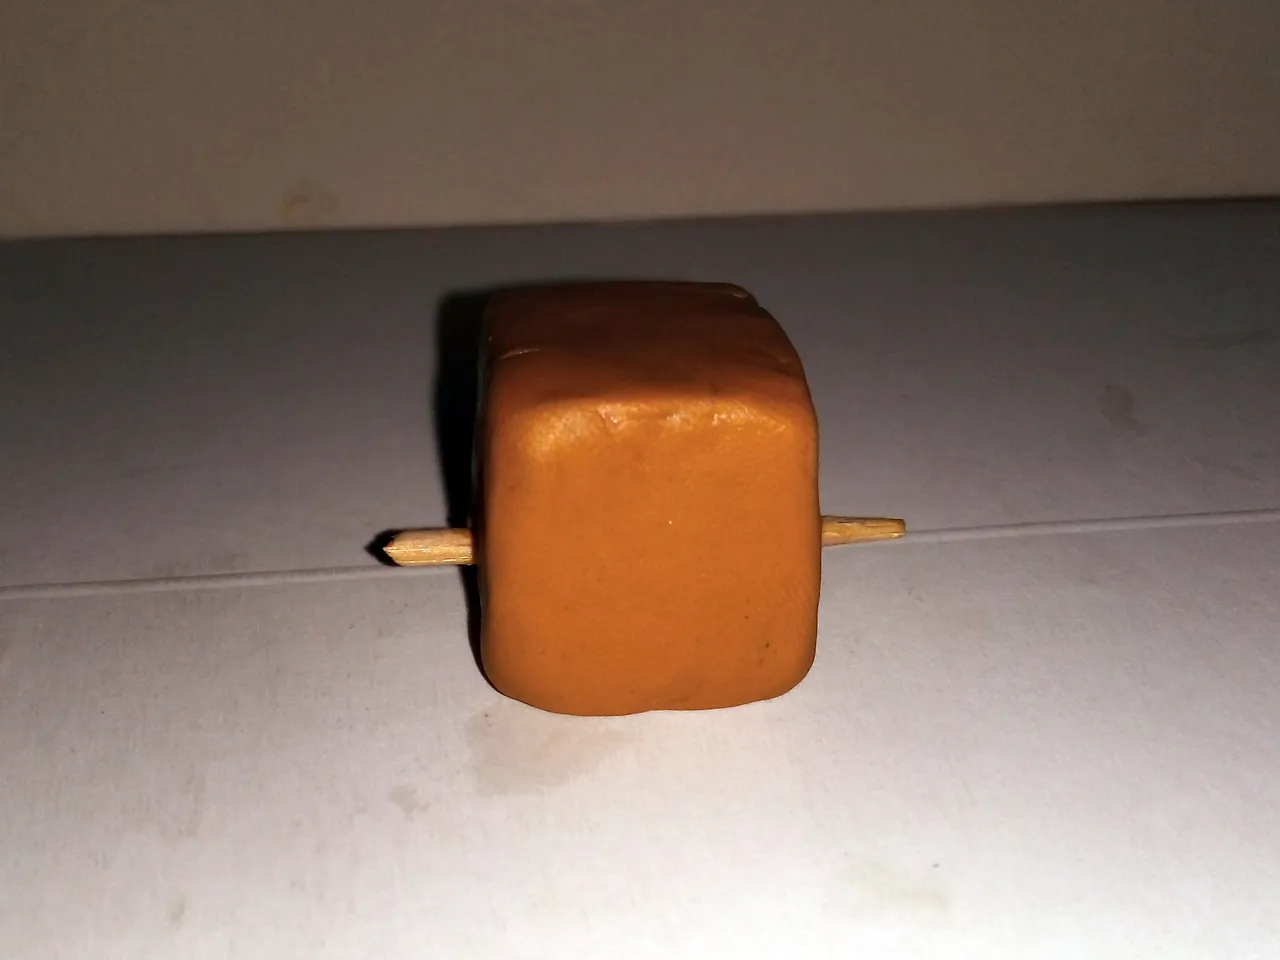
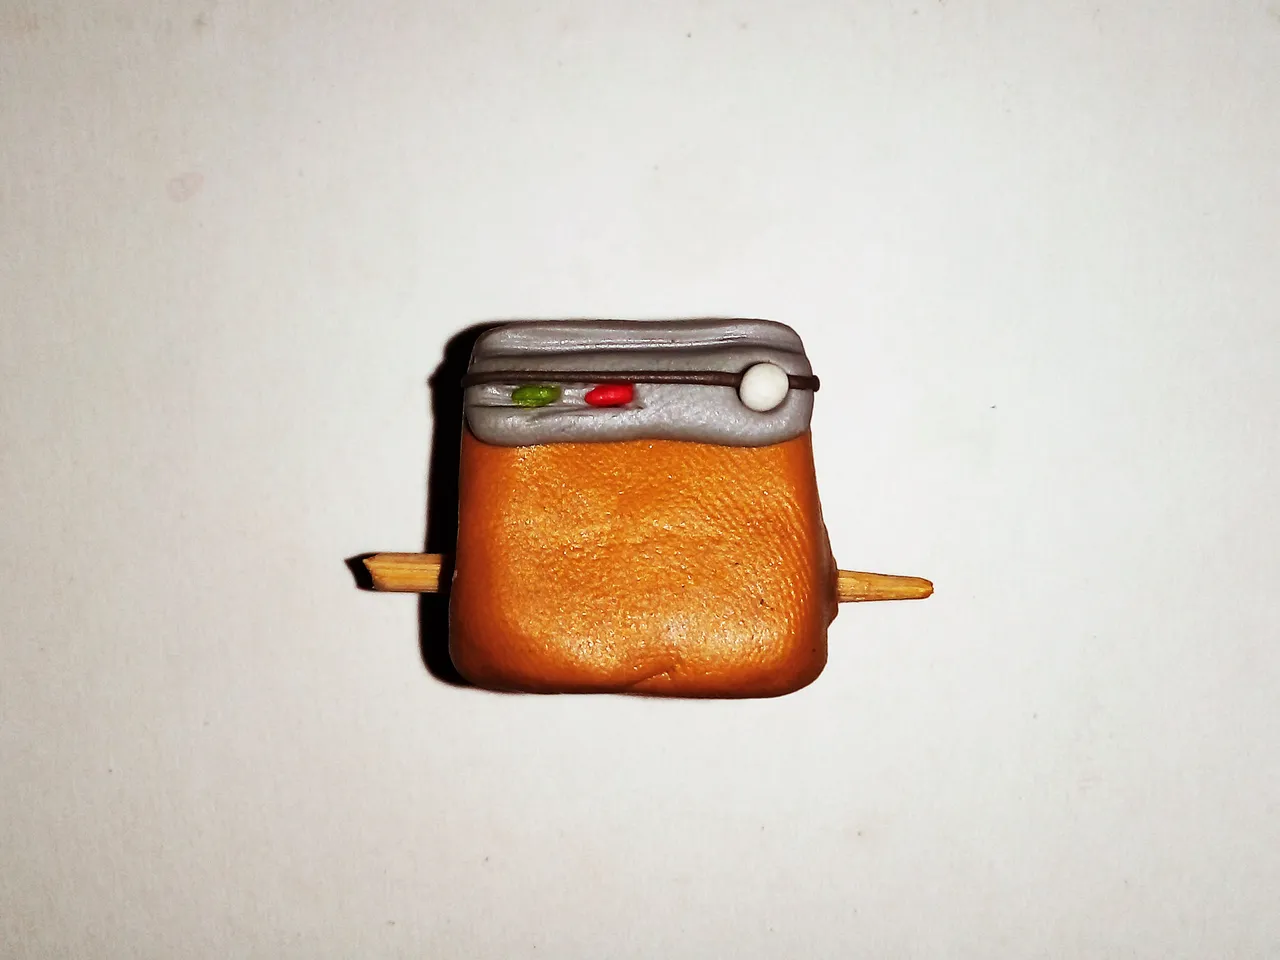
The main polystyrene cube, which in this case is the body of Wall-E, I covered it with an orange plasticine, mixed with some brown to get as close as possible to the color of the character. As you can see in the image below, I pierced a wooden stick at the base, for the caterpillars that the character has on his feet.
El cubo principal de poliestireno, que en este caso es el cuerpo de Wall-E, lo cubrí con una plastilina de color naranja, mezclado con algo de marrón para acercarme lo más posible al color del personaje. Como se observa en la imagen a continuación, atravesé un palillo de madera en la base, para las orugas que el personaje tiene en sus pies.
With gray plasticine, I made the panel that the character has on the upper part of the chest. A gray rectangle for the base of the panel, a red dot, a green dot and a white dot of plasticine make the rest of the panel, plus a black line to decorate a little more.
It should be noted that I made some lines with the knitting needle to mold some lines on the chest of the figure. In the images below are detailed the steps described:
Con plastilina gris, hice el panel que el personaje tiene en la parte superior del pecho. Un rectángulo gris para la base del panel, un puntito rojo, un puntito verde y un puntito blanco de plastilina conforman el resto del panel, además de una linea negra para decorar un poco más.
Cabe destacar, que hice unas líneas con la aguja de tejer para moldear unas líneas en el pecho de la figura. En las imágenes a continuación se detallan los pasos descritos:
 |  |
|---|
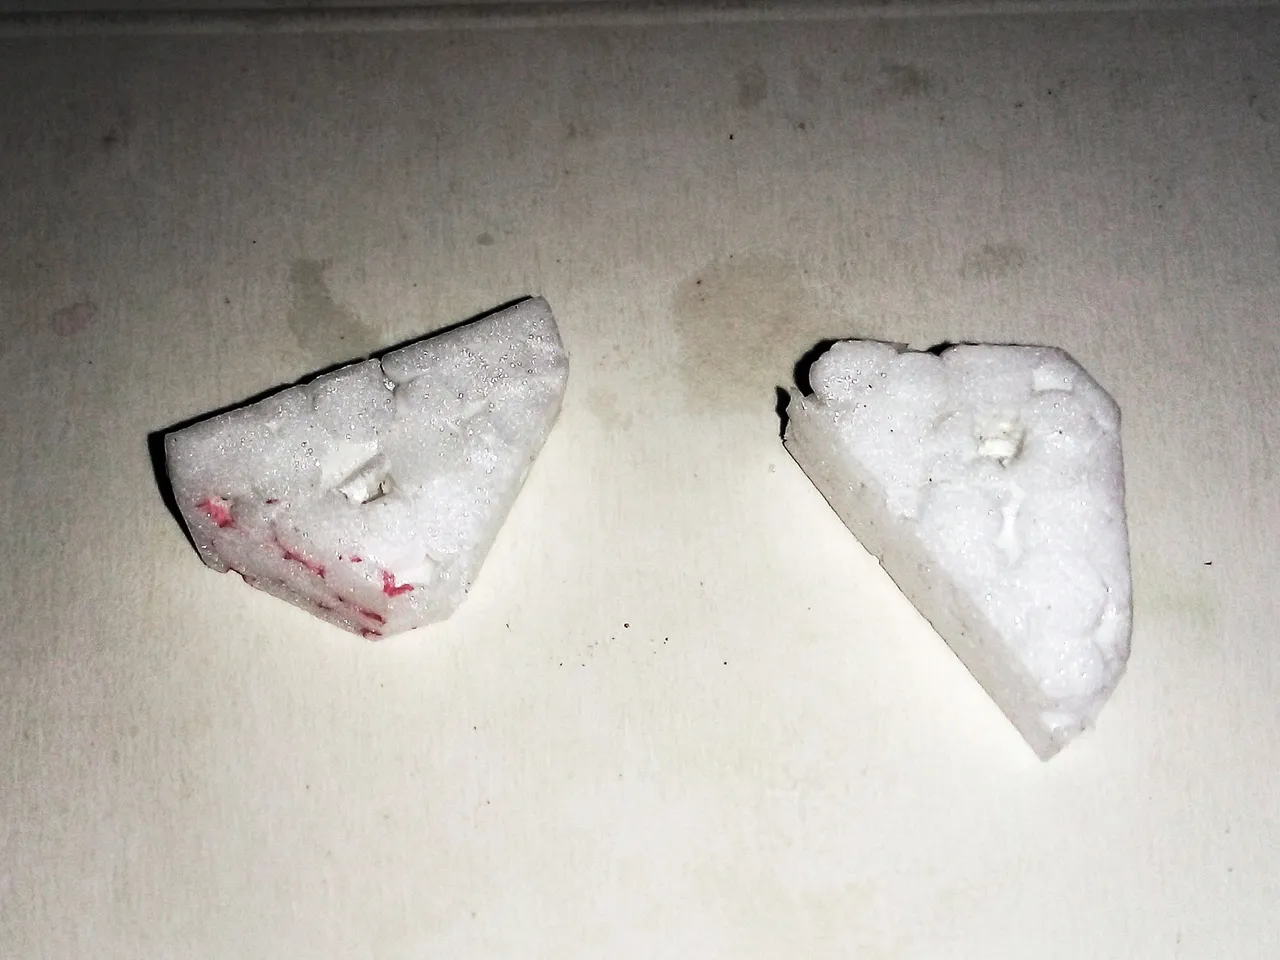
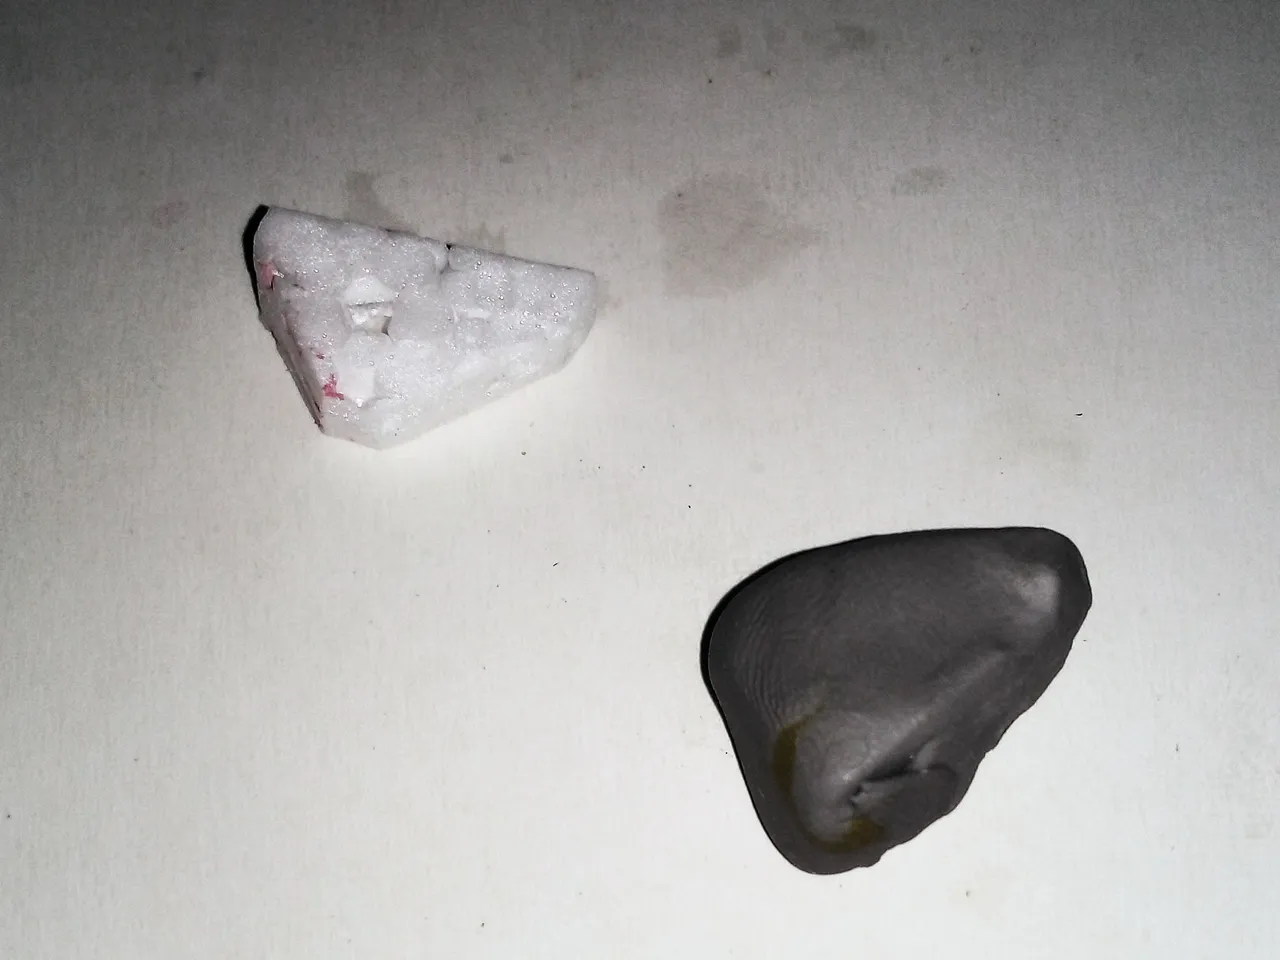
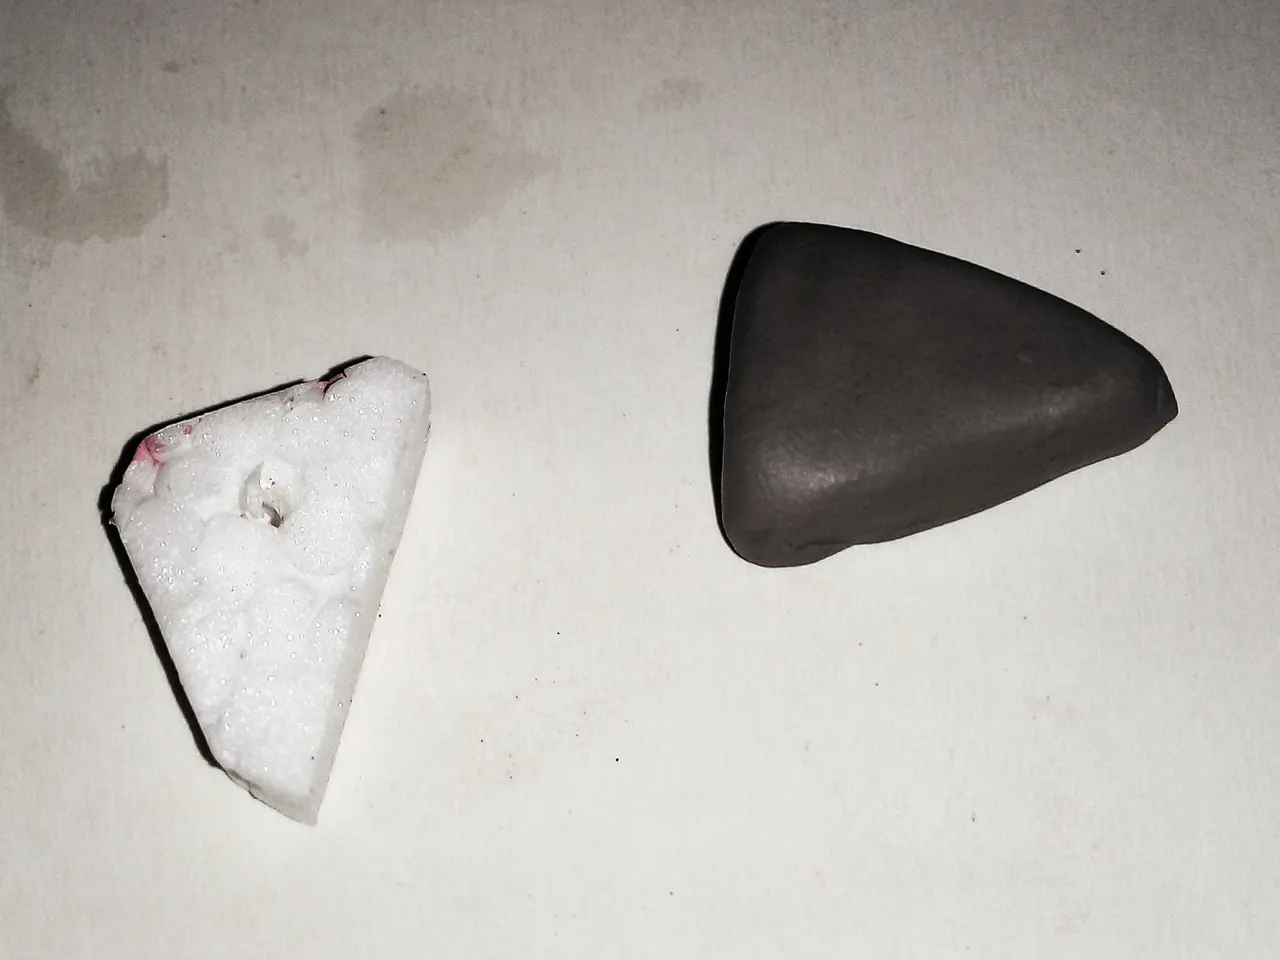
For the caterpillars/legs of the character I first used polystyrene triangles. I covered each one with dark gray plasticine and then molded the surface to give it an adequate finish. Here are three pictures where you can see the process:
Para las orugas/piés del personaje usé primeramente unos triángulos de poliestireno. Cada uno lo cubrí con plastilina gris oscura y luego moldeé la superficie para dejarle un acabado adecuado. A continuación tres fotografías en donde se observa el proceso:
 |  |  |
|---|
After I finished the chest, I placed two small pieces of gray plasticine on both sides of the chest panel. Then I made some marks on the character's feet to simulate caterpillars.
This is how the character looks like so far:
Después de haber terminado el pecho, coloqué dos pequeños trozos de plastilina gris a ambos lados del panel del pecho. Luego hice unas marcas en los pies del personaje para simular orugas.
De esta manera va quedando el personaje hasta ahora:

Okay, time for the head. To make it I used a whole piece of wire for the neck and eyes. As you can see in the collage below, first I covered the neck with the plasticine of the same color as the chest. Then I placed two cylinders for the eyes through the wire, then a flattened sphere of play dough on the back to cover the wire.
Bien, turno de la cabeza. Para hacerla usé una pieza completa de alambre para el cuello y los ojos. Como pueden ver en el collage de abajo, primeramente cubrí el cuello con la plastilina del mismo color que el pecho. Posteriormente coloqué dos cilindros para los ojos atravesados por el alambre, luego una esfera aplastada de plastilina en la parte trasera para cubrir el alambre.
Next was to place two flattened spheres of gray play dough on the rest of the wire for the big part of the eyes, that part that makes Wall-E look like he has sad eyes all the time. To do this I made two cylinders of gray play dough and flattened it at one end. Then I placed two flattened black spheres for the character's eyes.
Lo siguiente fue colocar dos esferas aplastadas de plastilina gris en el resto del alambre para la parte grande de los ojos, esa parte que hace parecer que Wall-E tiene los ojos tristes todo el tiempo. Para hacer esto hice dos cilindros de plastilina gris y la aplasté en uno de los extremos. Luego coloqué dos esferas negras aplastadas para los ojos del personaje.
 |  |
|---|
Here's how it's coming along so far. Adorable level: Plasticine Wall-E.
A continuación les muestro cómo va quedando hasta ahora. Adorable nivel: Wall-E de plastilina.
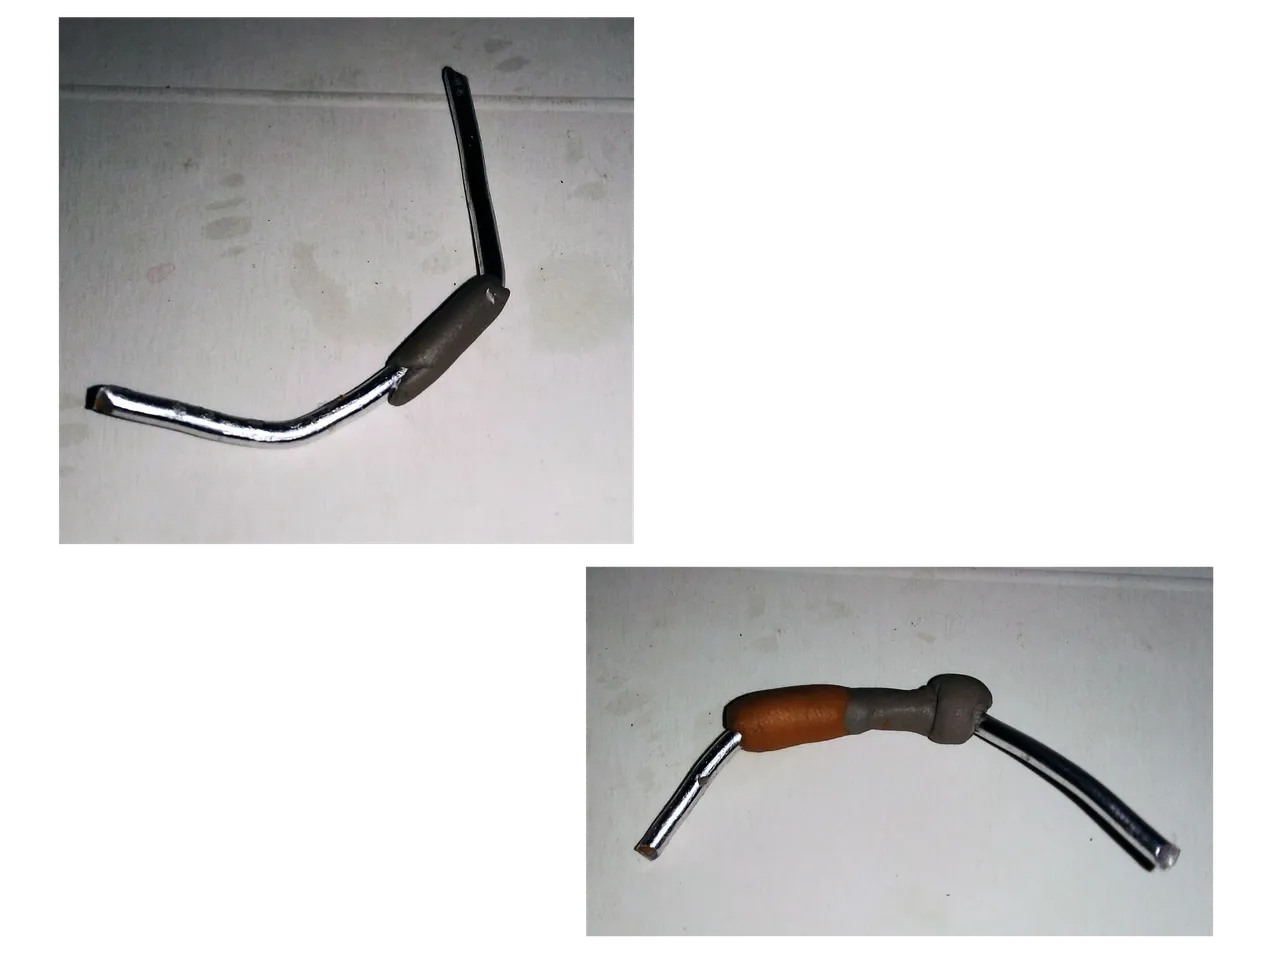
Time for the arms. To make the left arm I decided to use a piece of wire, because this arm would hold a bouquet of flowers, as you can see in the cover image.
Once I cut the piece of wire I covered one part with gray plasticine and the other with orange plasticine. Finally I placed a small sphere for the hands on the gray end.
Turno de los brazos. Para hacer el brazo izquierdo me decidí por usar un trozo de alambre, pues este brazo sostendría un ramo de flores, tal como lo observan en la imagen de portada.
Una vez que corté el trozo de alambre cubrí una parte con plastilina gris y otra con plastilina naranja. Finalmente coloqué en el extremo gris una pequeña esfera para las manos.
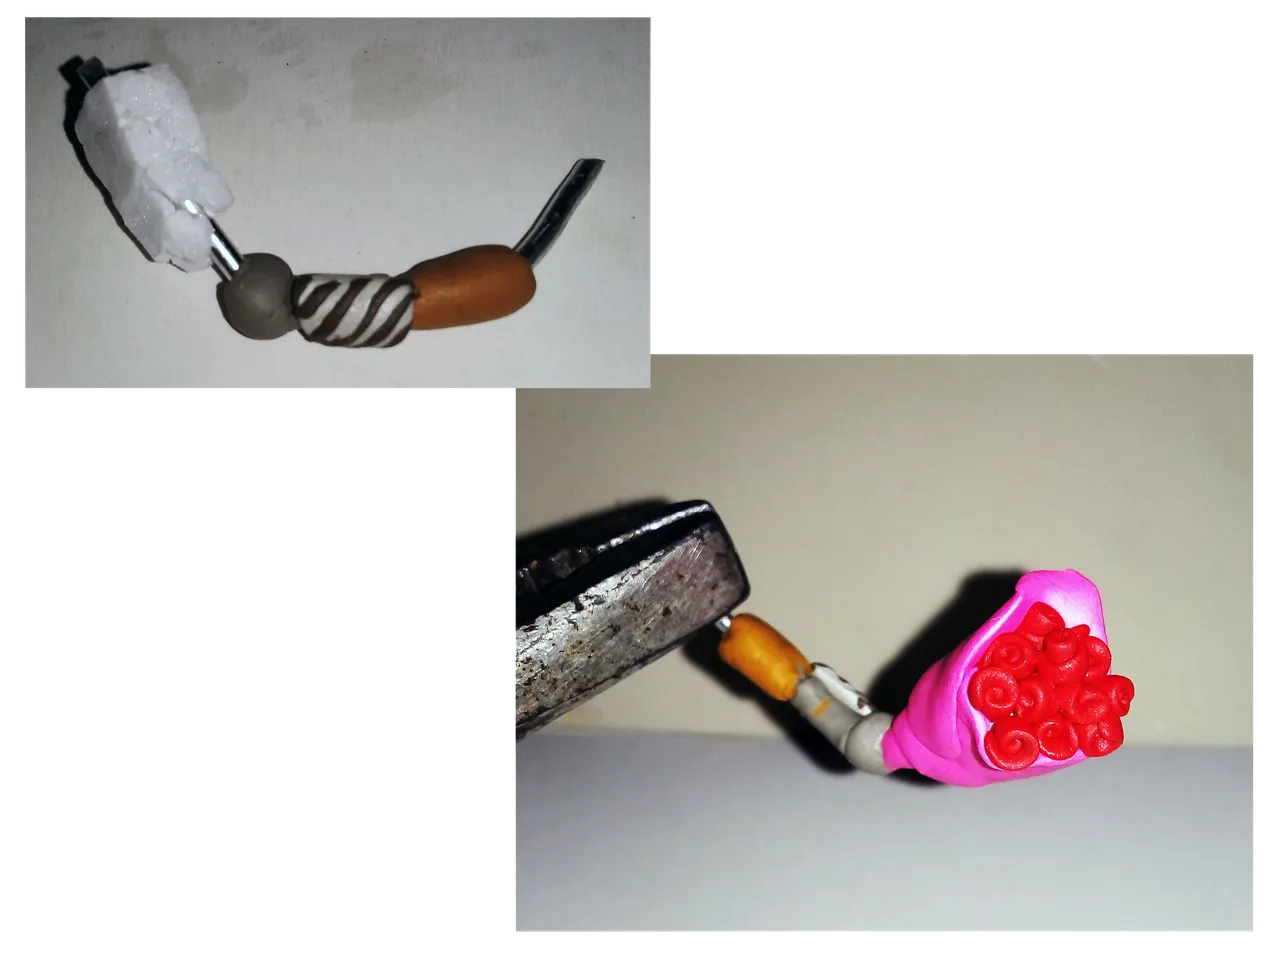
Here I show you that I placed a kind of white and gray plate on the arm, but this I later stitched it. On the rest of the wire I placed a polystyrene cone and covered it with pink plasticine, and then placed small roses in the center.
How are the roses made? They are simply lines of flattened play dough that are rolled up. Like a cinnamon roll, but made of red play dough.
Aquí les muestro que le coloqué una suerte de placa blanca con gris en el brazo, pero esto posteriormente se la guité. En el resto del alambre coloqué un cono de poliestireno y lo cubrí con plastilina rosada, para luego colocar pequeñas rosas en el centro.
¿Que cómo se hacen las rosas? Simplemente son líneas de plastilina aplastada que se enrollan. Como un roll de canela, pero de plastilina roja.
Just as I made the left arm, I made the right arm, with the difference that I used a wooden stick as a support instead of the wire. Once each arm was finished, I put them in place, using glue to give more firmness to each joint.
Below you can see the final result of Wall-E.
Así como hice el brazo izquierdo, hice el brazo derecho, con la diferencia que usé un palillo de madera como soporte en lugar del alambre. Una vez terminado cada brazo, los coloqué en su lugar, usando pegamento para darle mayor firmeza a cada unión.
A continuación pueden ver el resultado final de Wall-E.
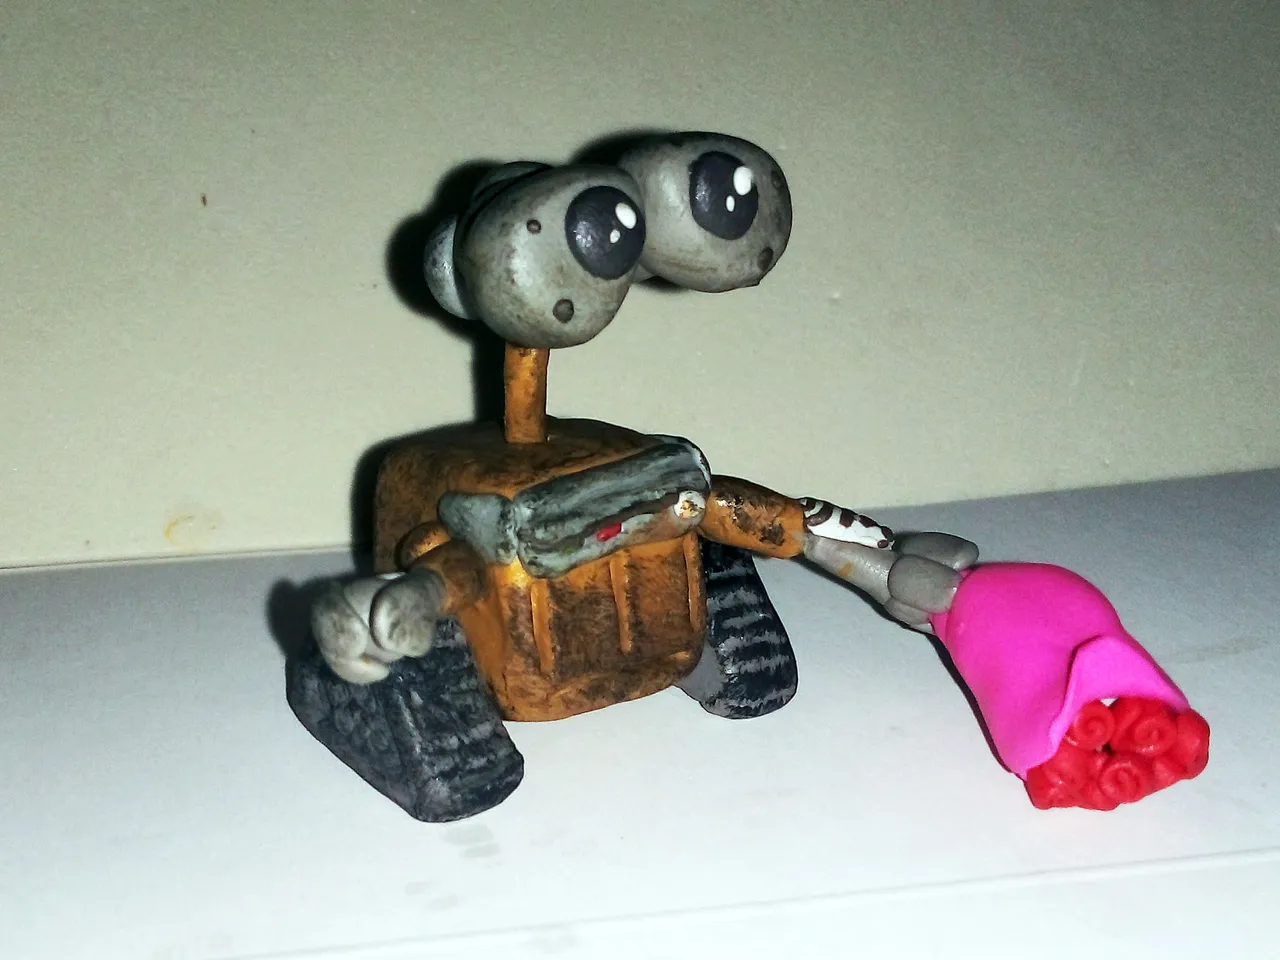
At this point I saw Wall-E and it was like he was missing something, I don't know, he was different from the character. That's when I realized what it was that he was missing, dirtiness! Wall-E is a garbage collector, so he's always dirty. The one I made looked like one that had just come out of the factory and I had to improve on that.
With this in mind, I took a paintbrush and, using the dry brush technique, gave him a few strokes of dark brown paint. I also painted the caterpillars black. Below you can see the result.
En este punto veía a Wall-E y como que le faltaba algo, no sé, era distinto al personaje. Fue entonces cuando me di cuenta de qué era lo que le faltaba, ¡Suciedad! Wall-E es un recolector de basura, así que siempre está sucio. El que hice parecía uno recién salido de fábrica y debía mejorar eso.
Con esto en mente, tomé un pincel y, con la técnica del pincél seco, le di unas pinceladas con pintura marrón oscuro. Además, le pinté las orugas de color negro. A continuación pueden ver el resultado.
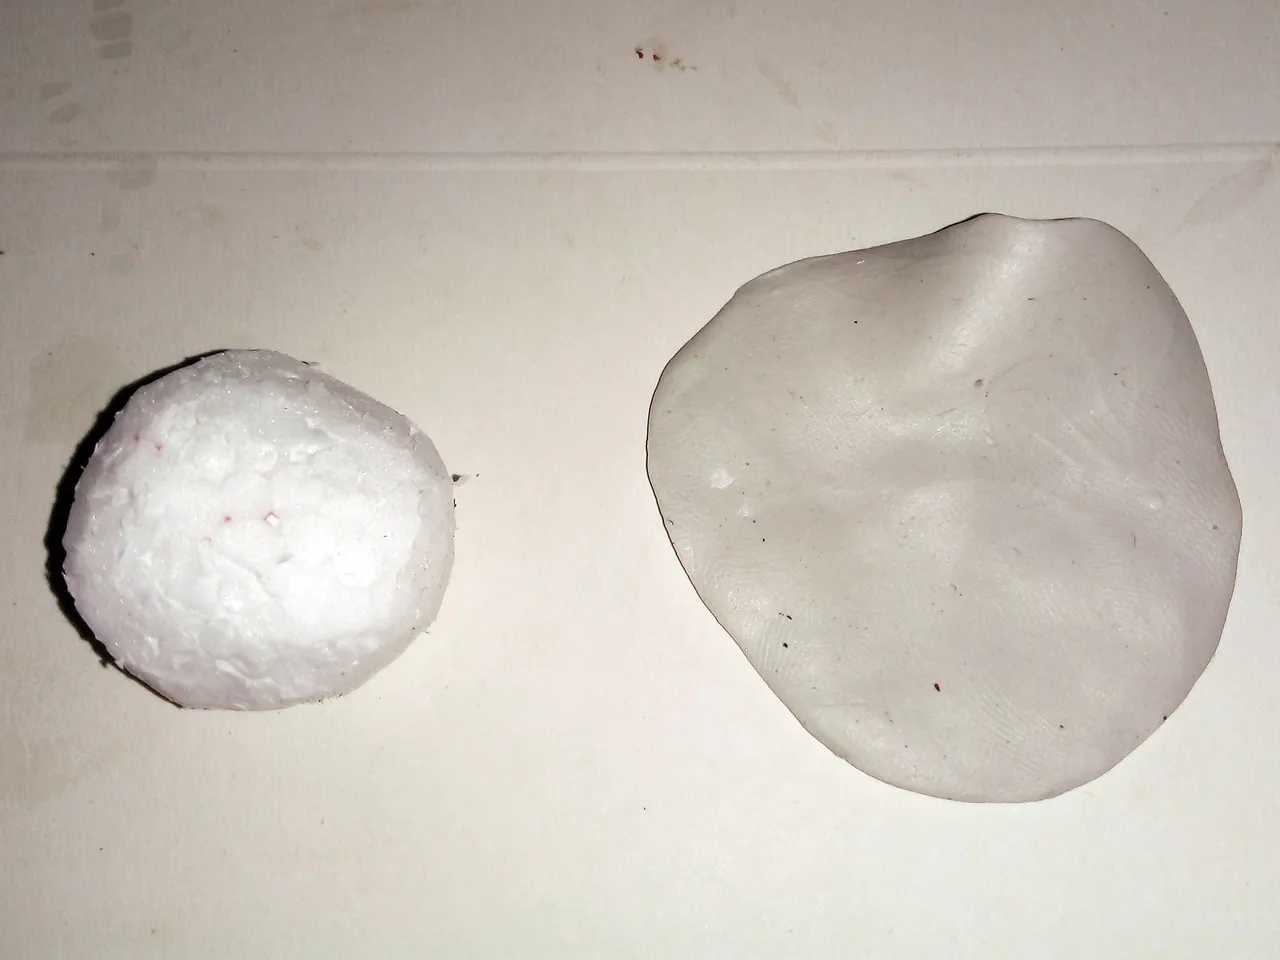
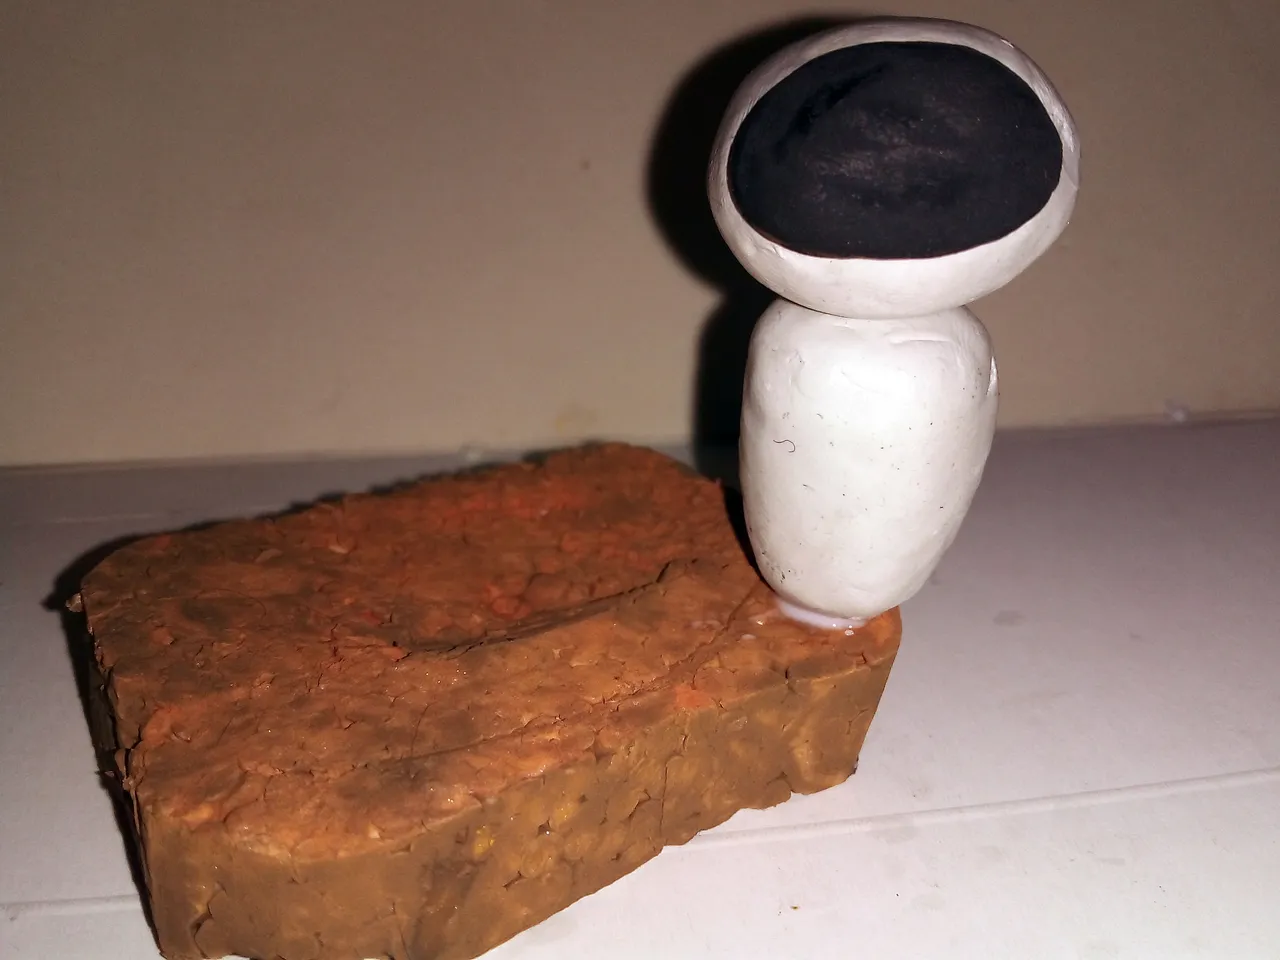
Okay, Eva's turn. For this I followed the same way of working. Polystyrene base covered with plasticine. First I stretch the plasticine and then I cover the polystyrene piece with the plasticine, white in this case.
Bien, turno de Eva. Para ello seguí la misma manera de trabajar. Base de poliestireno cubierta con plastilina. Primero estiro la plastilina y luego cubro el trozo de poliestireno con la plastilina, blanca en este caso.
 |  |
|---|
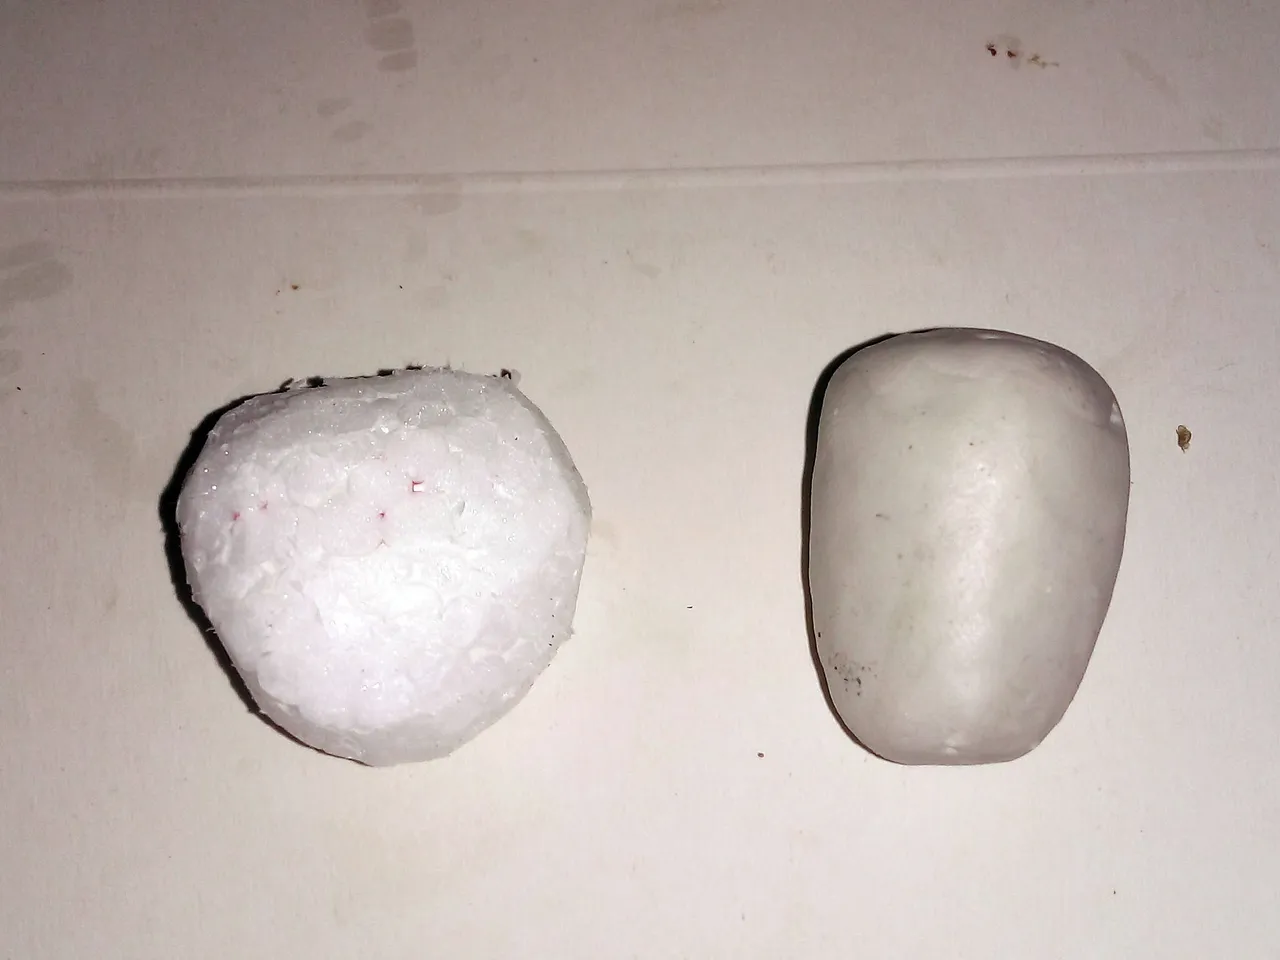
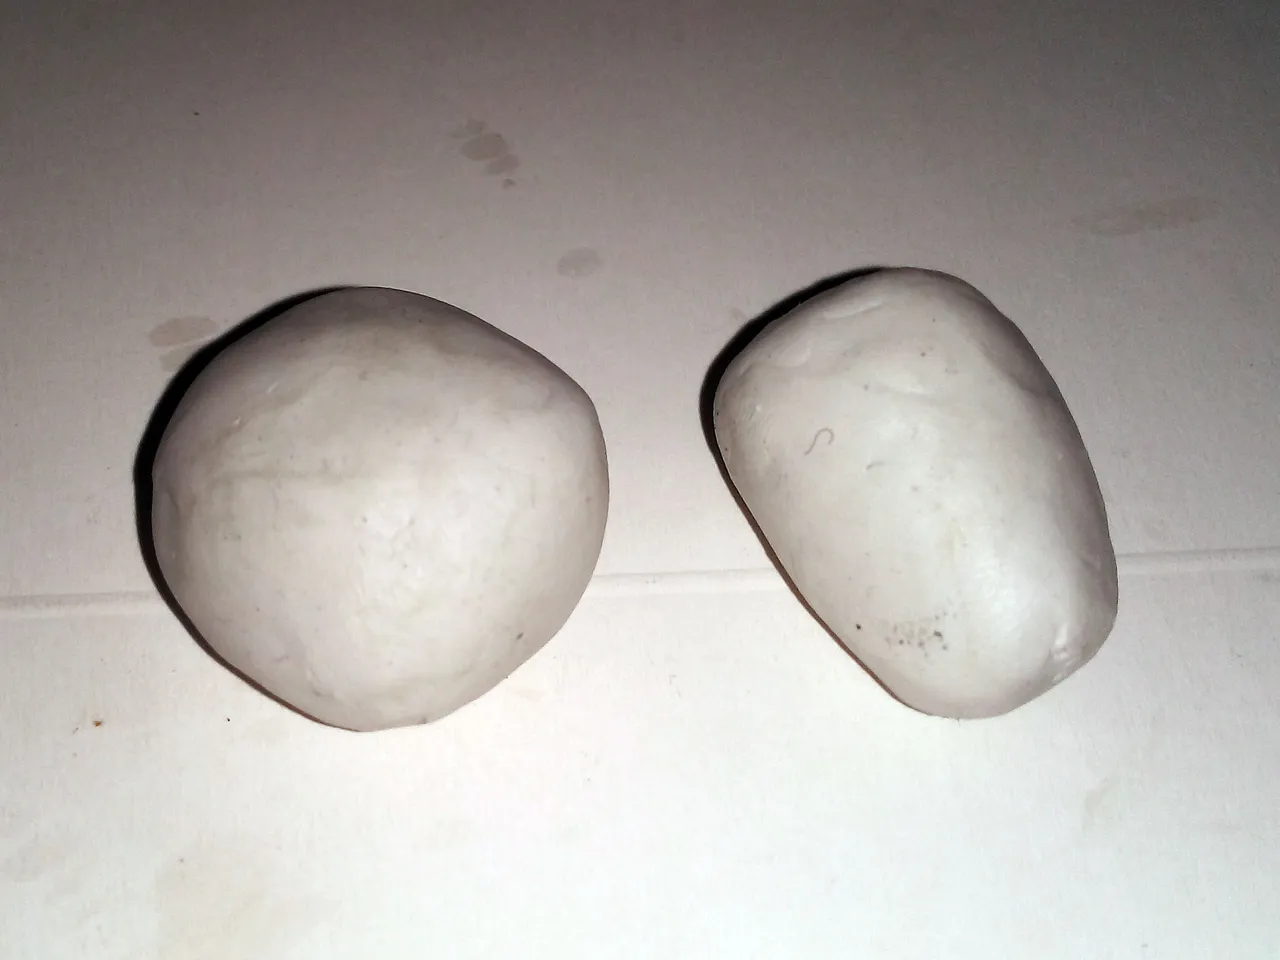
Below you can see how the two pieces look separately, once covered with the white plasticine.
A continuación pueden observar cómo se ven las dos piezas por separado, una vez cubiertas con la plastilina blanca.
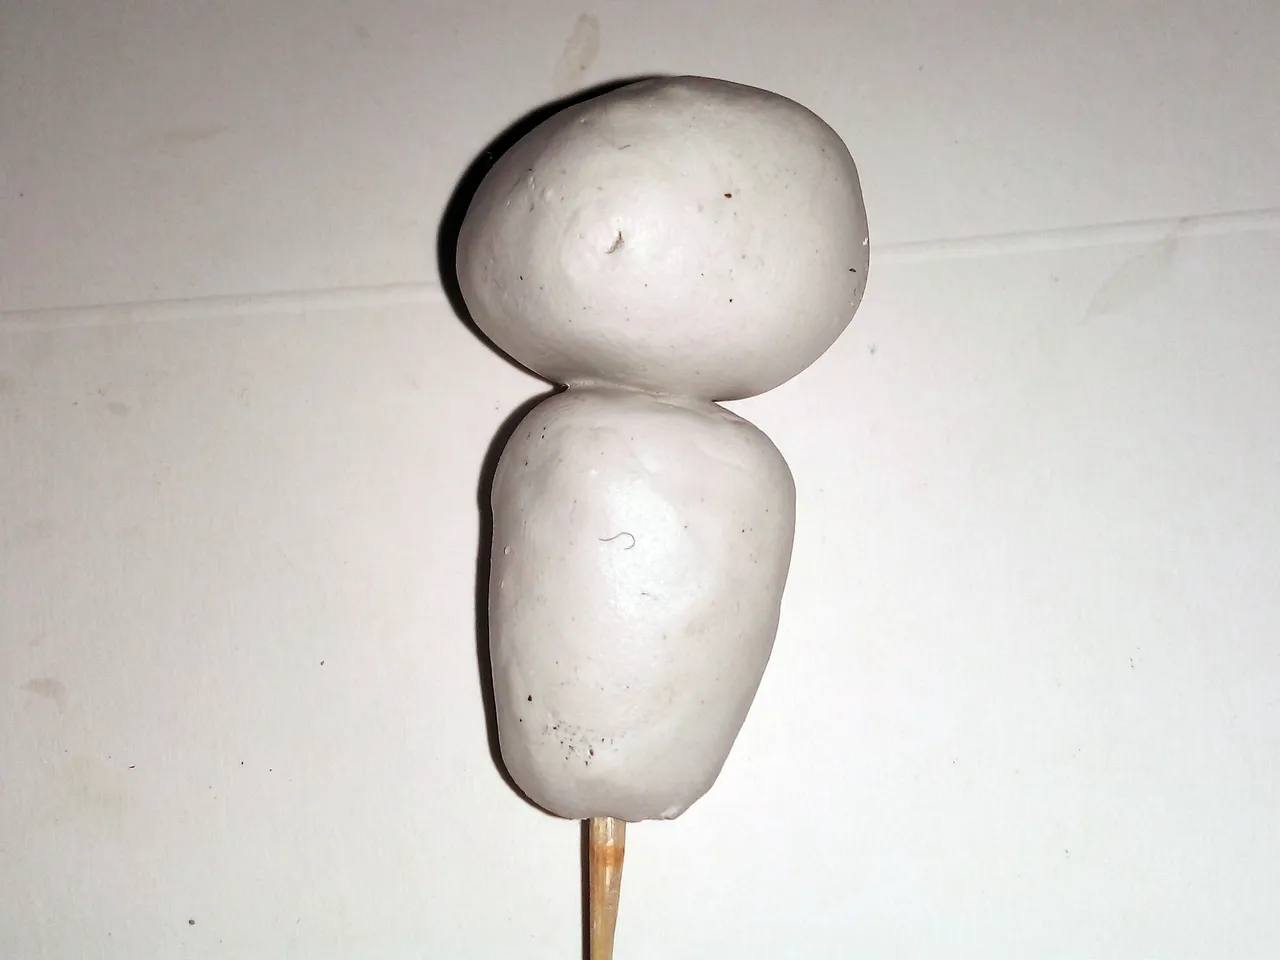
And in the image below you can see the two pieces once joined with glue and a wooden stick that goes through both pieces as a single support.
Y en la imagen de abajo se pueden apreciar las dos piezas una vez unidas con pegamento y un palillo de madera que atraviesa ambas piezas como un único soporte.
As a base for the figurine I cut a piece of polystyrene and cut it with imperfections, to simulate the terrain of the film; also, I painted it with a tone similar to that seen in those desert scenes.
On this base I fixed Eva, using a wooden stick and glue; later, I made an elongated black plasticine tortilla for the viewfinder on which the character's face is drawn.
Como base para la figurita corté un trozo de poliestireno y lo corté con imperfecciones, para simular el terreno de la película; además, lo pinté con una tonalidad parecida a la que se aprecia en aquellos escenarios desérticos.
En esta base fijé a Eva, valiéndome del palillo de madera y pegamento; posteriormente, hice una tortilla alargada de plastilina negra para el visor en el que se dibuja el rostro del personaje.
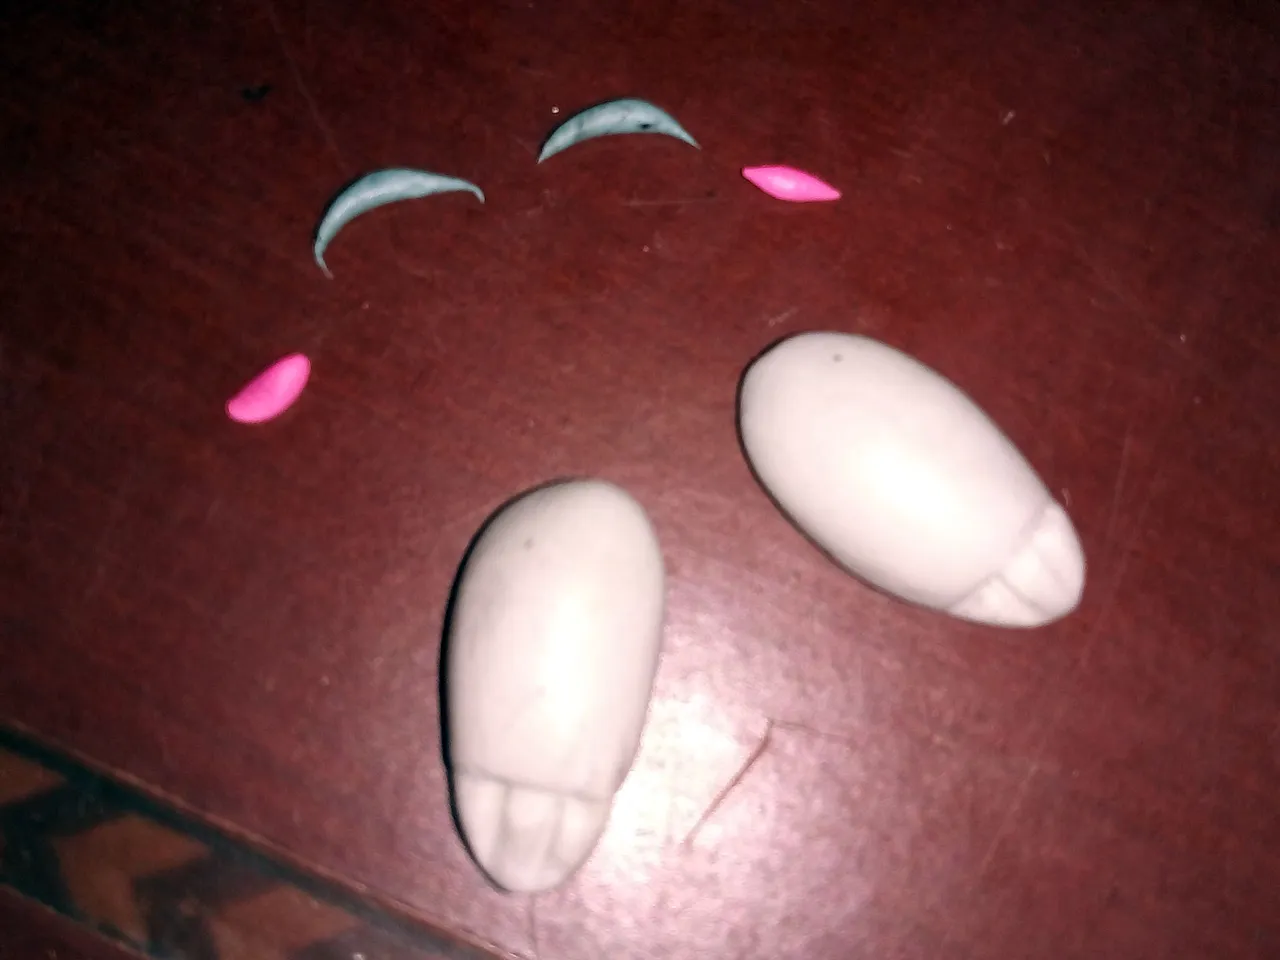
For Eva's expressions, I made two thin lines of blue plasticine, which would be used for the eyes, and two small elongated spheres of pink plasticine, to simulate blushing. The arms were two flattened cylinders, to make the little fingers I used the tip of a wooden stick to outline these little fingers. Then I put everything in its place.
Para las expresiones de Eva, hice dos líneas delgadas de plastilina azul, que servirían para los ojos, y dos pequeñas esferas alargadas de plastilina rosada, para simular rubor. Los brazos fueron dos cilindros aplastados, para hacer los deditos usé la punta de un palillo de madera para delinear estos deditos. Luego coloqué todo en su lugar.
 |  |
|---|
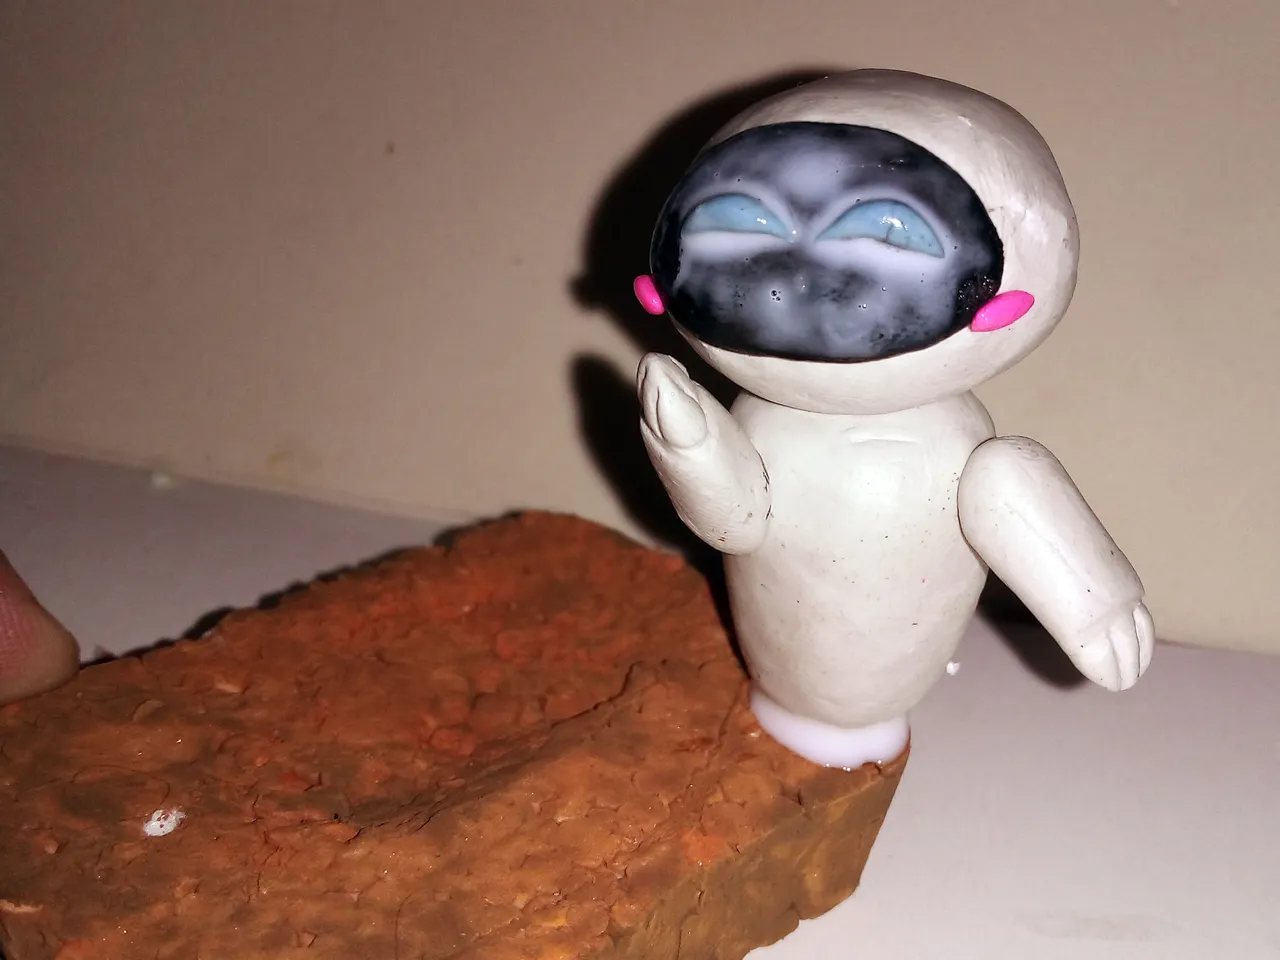
As you can see in the image below, I used glue to fix the eyes and blush on Eva's face. I also used glue and a wooden stick to fix Wall-E firmly in place.
Como observan en la imagen a continuación, usé pegamento para fijar los ojos y rubor en el rostro de Eva. También usé pegamento y un palillo de madera para fijar firmemente a Wall-E en su lugar.
At this point, just let everything dry and do not move anything. It took about an hour, but this is how it looked once the figurine was dry:
En este punto, simplemente hay que dejar que todo se seque y no mover nada. Tardó apróximadamente una hora, pero así quedó una vez seca la figurita:
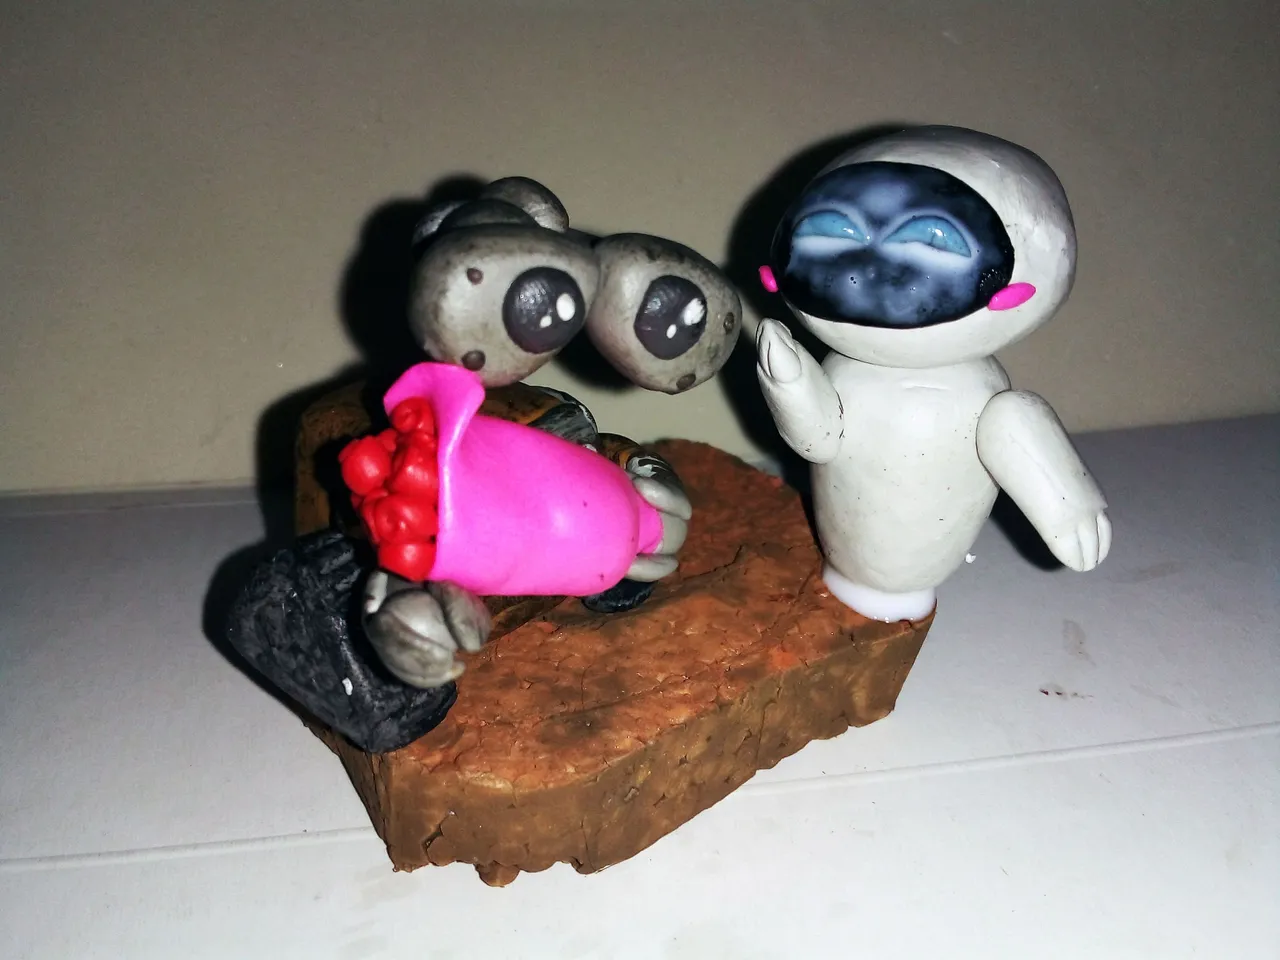
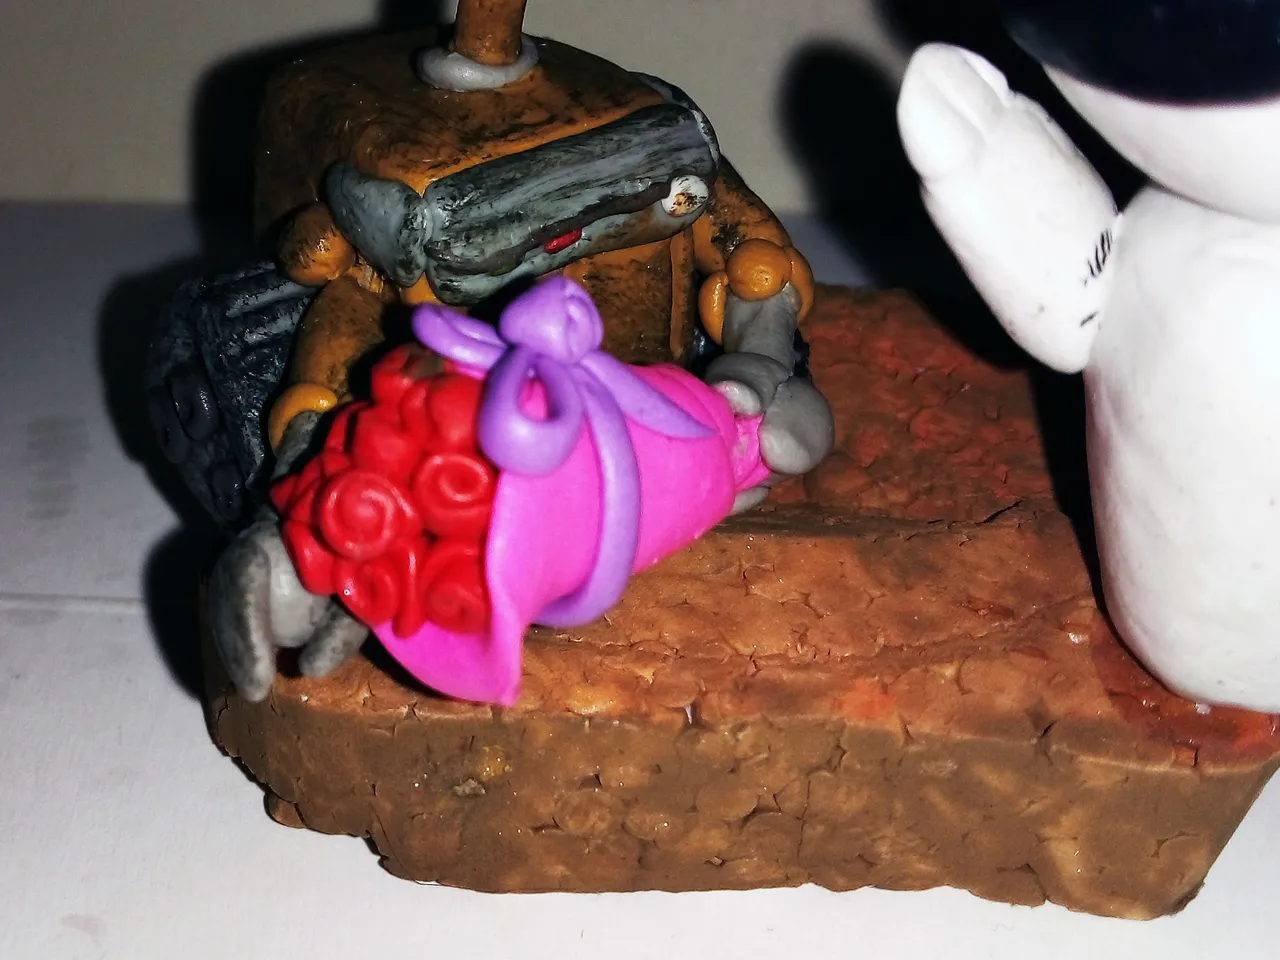
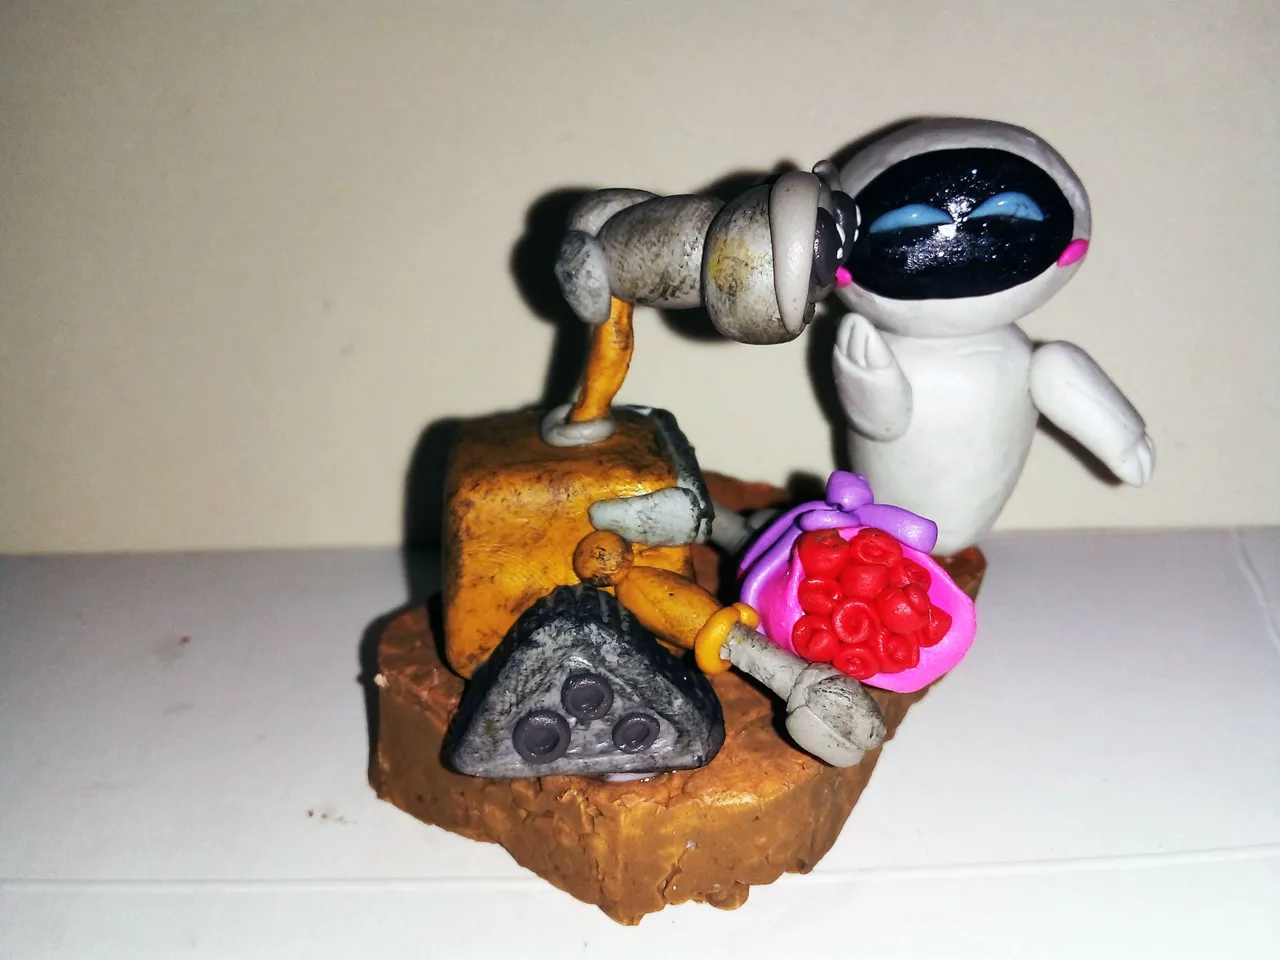
I also placed a loop on Wall-E's bouquet of flowers and since the wire that holds that arm is malleable, I was able to move it so that it was over both of the character's hands.
También coloqué un lazo en el ramo de flores de Wall-E y como el alambre que sostiene ese brazo es maleable, pude moverlo para que estuviera sobre ambas manos del personaje.
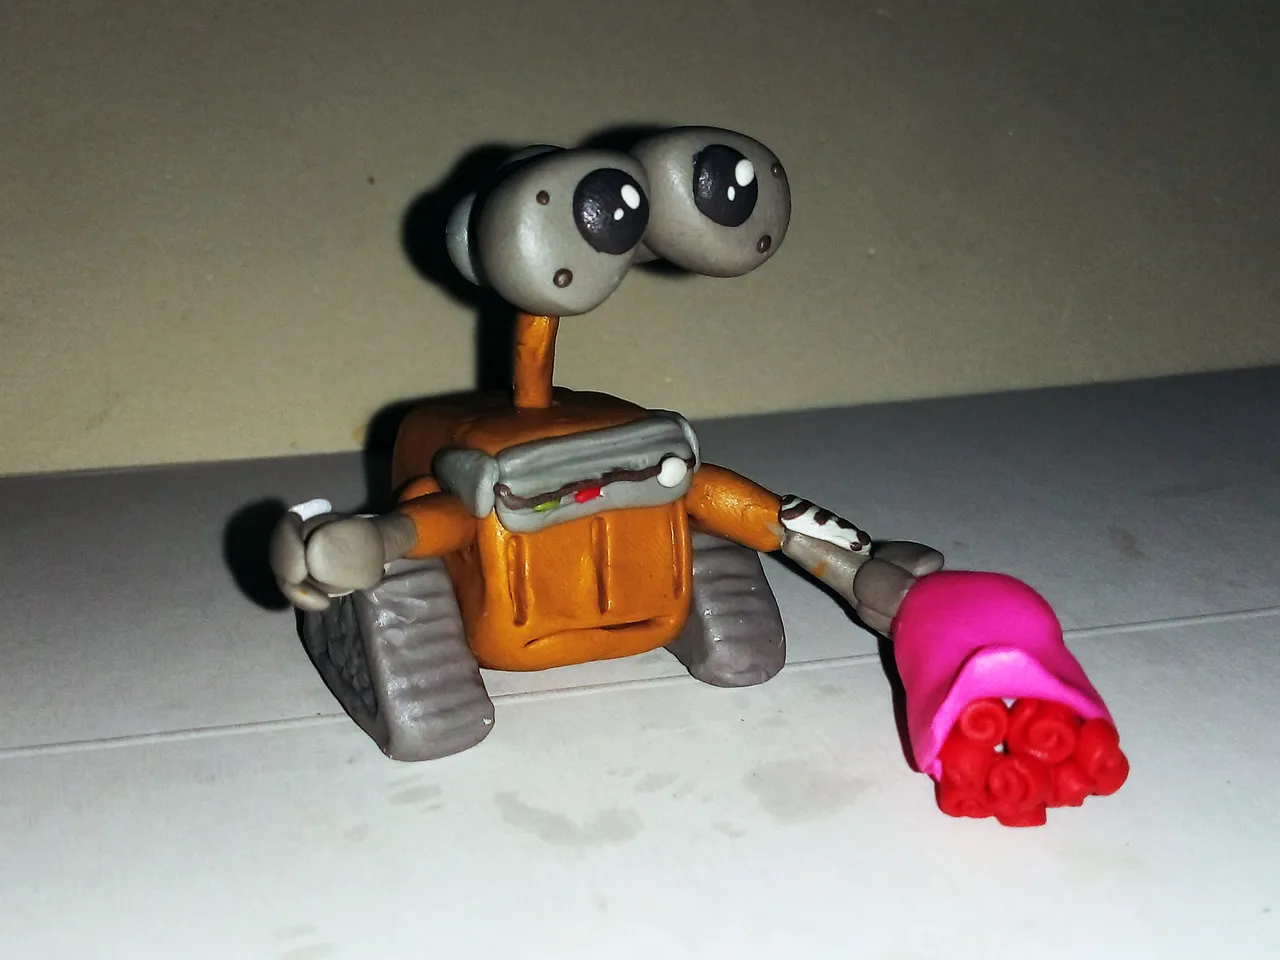
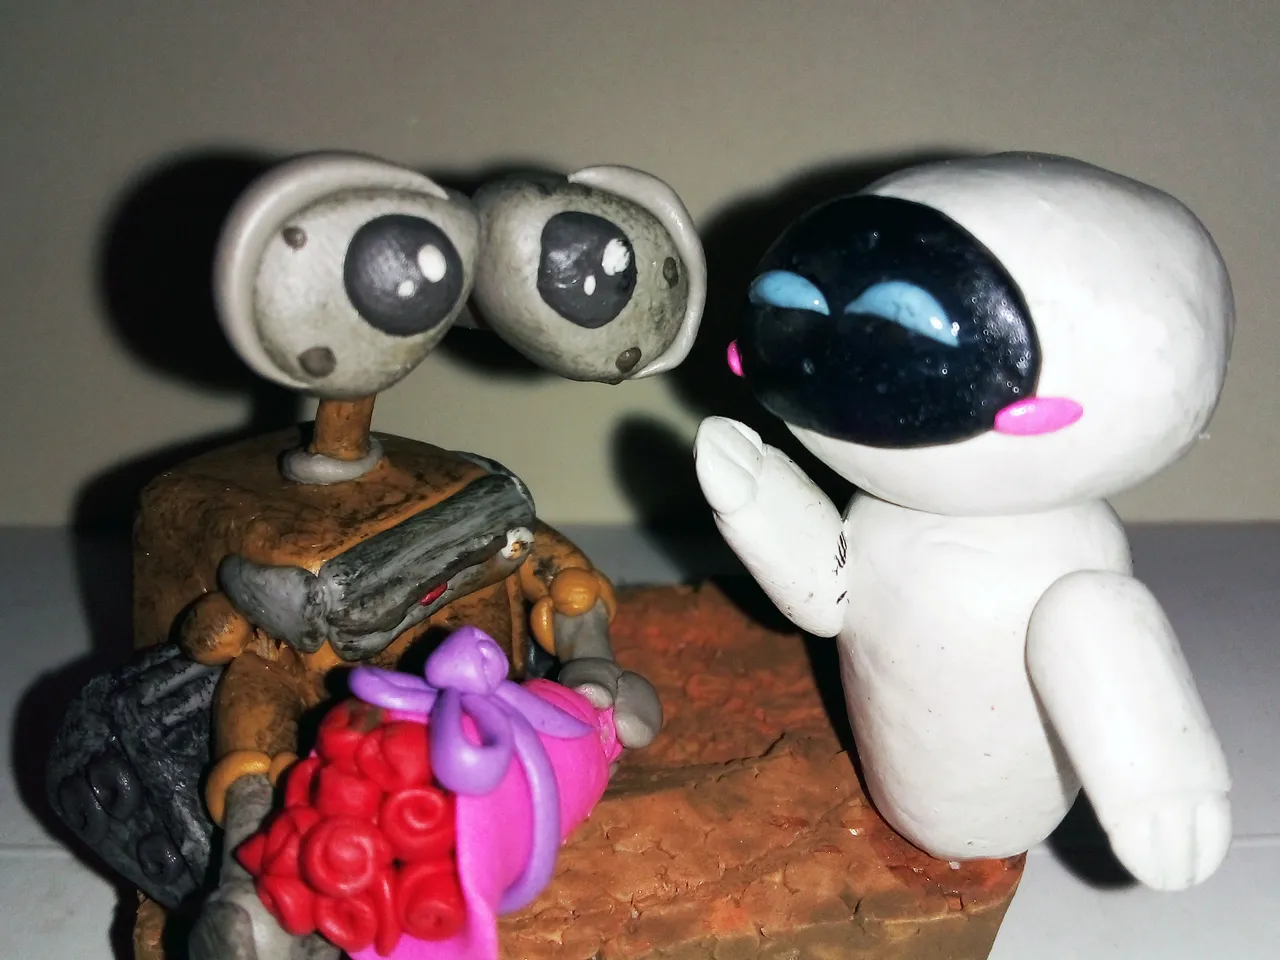
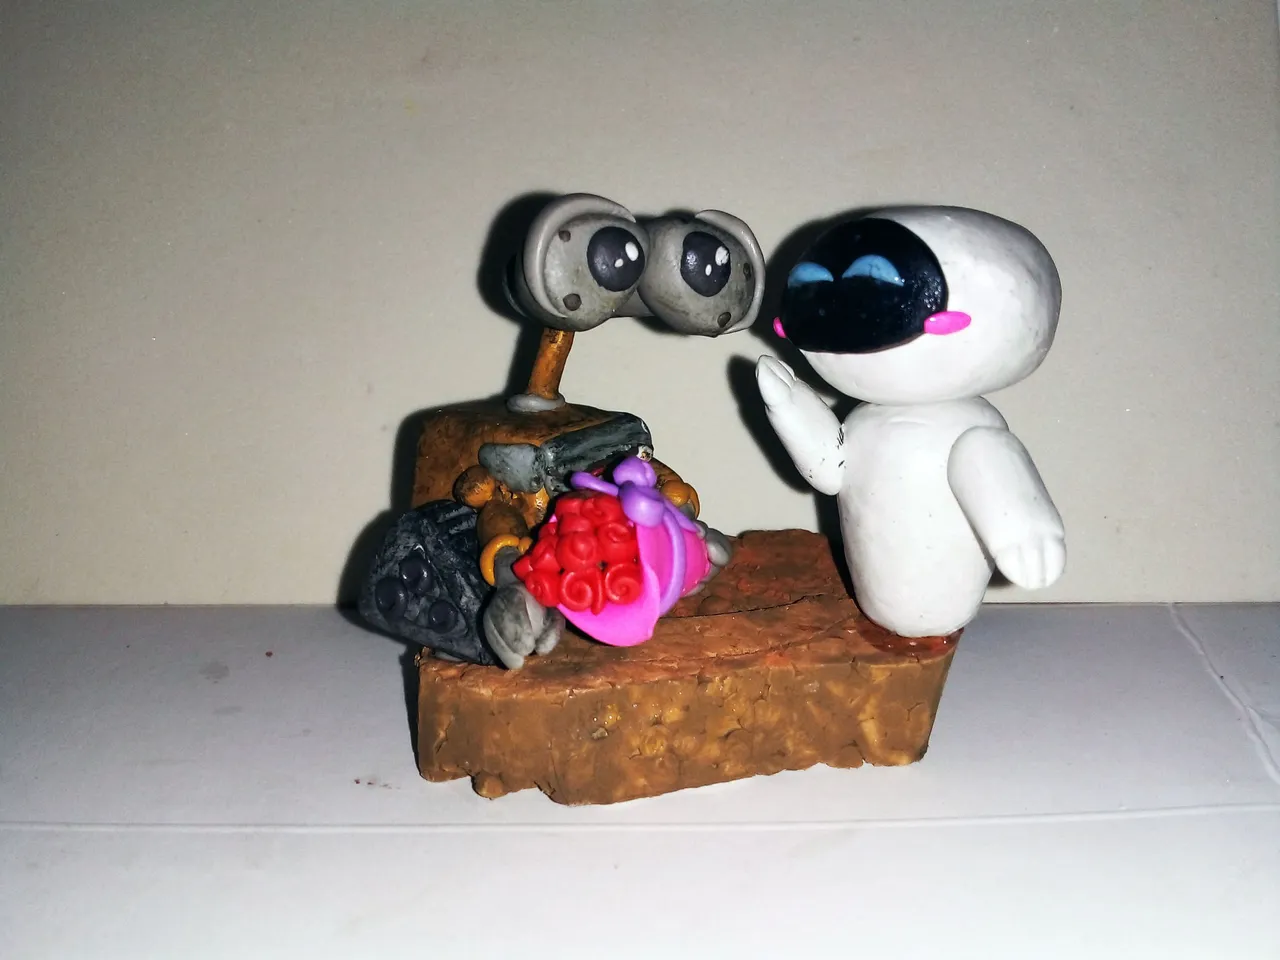
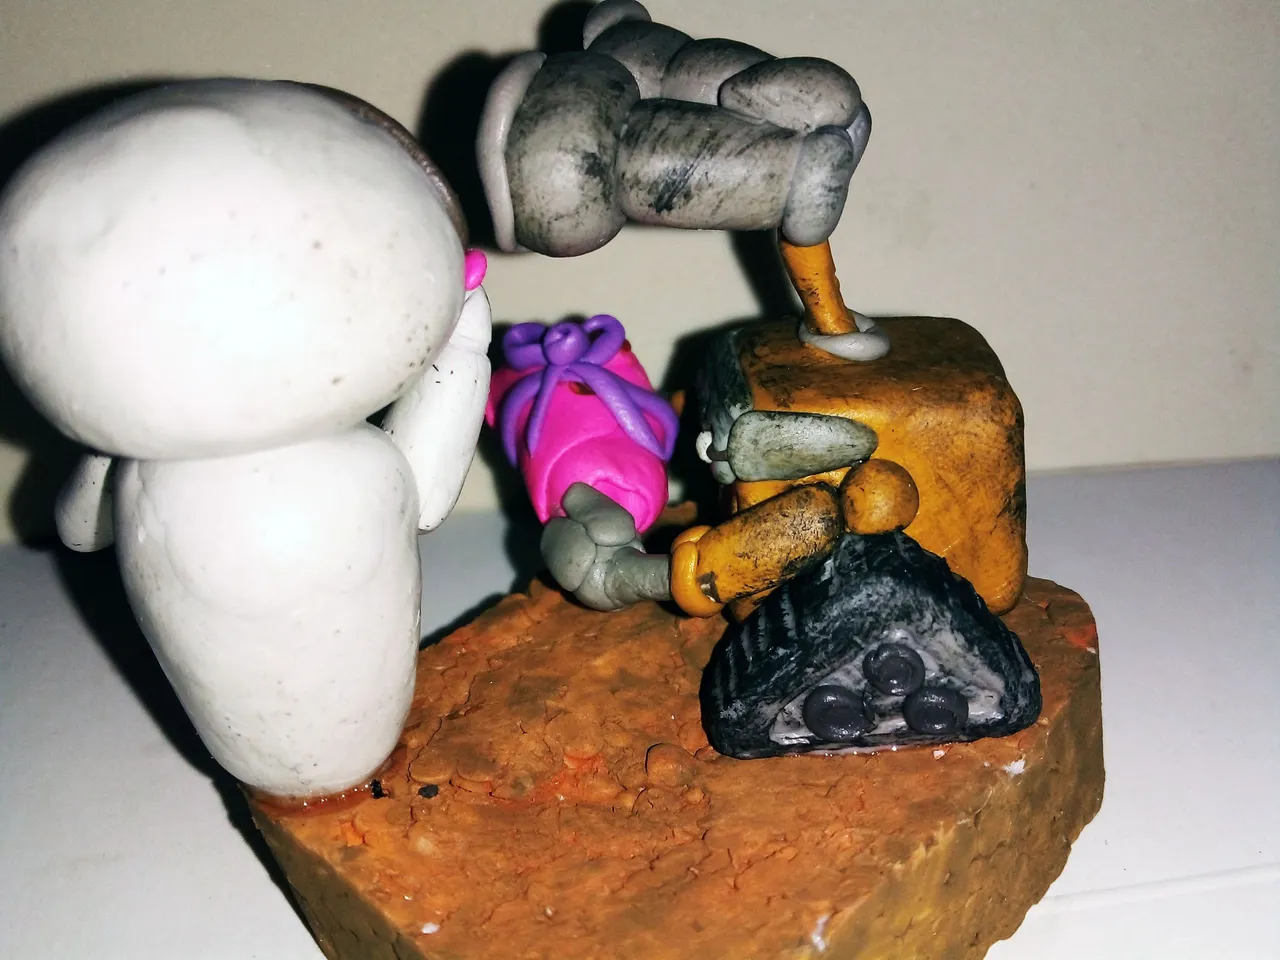
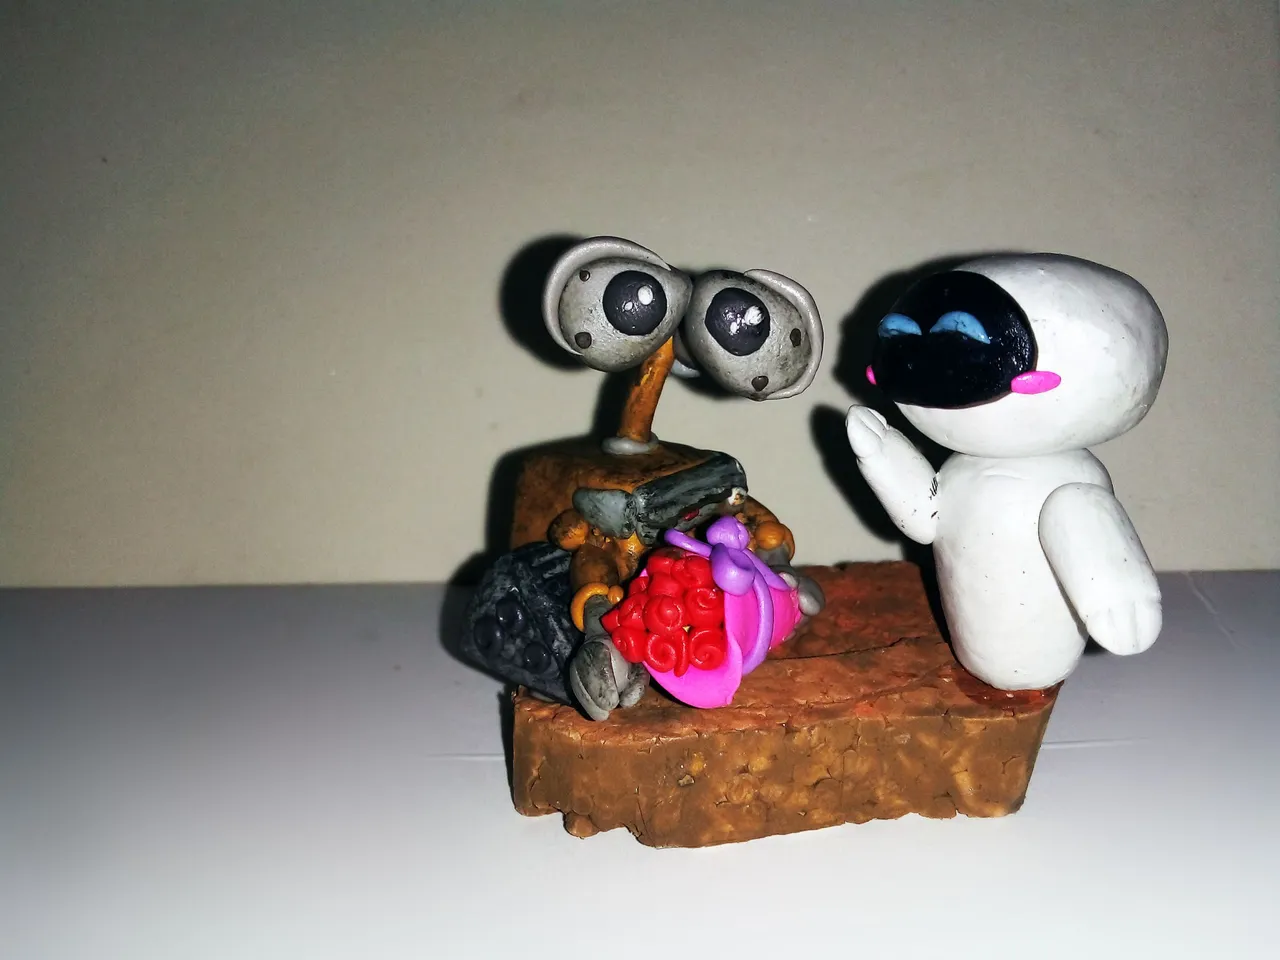
And this is how this adorable diorama of Wall-E and Eva was finished. Here are some pictures of the final result:
Y de esta manera quedó terminado este adorable diorama de Wall-E y Eva. A continuación les dejo una serie de fotografías del resultado final:

Well friends, that's all for now. I invite you all to participate in the contest. Cheer up with the crafts ladies.
I also invite you to leave your opinions below in the comments, as always I will be happy to read them. With nothing more to add I'll say goodbye then....
See you next time!
Bien amigos, esto ha sido todo por ahora. Los invito a todos a participar en el concurso. Anímense con las manualidades señoritas.
También los invito a dejar sus opiniones abajo en los comentarios, como siempre estaré encantado de leerlos. Sin más que agregar me despido entonces...
¡Hasta la próxima!

Traducido con DeepL
My Book Collection
RisingStar Update + Giveaway: Win 2000 Starbits + 2 Common Cards
Community Celebration: HiveDiy