
Hello friends of this beautiful creative community !!! I hope everybody is fine. Today I want to participate in this initiative and for that I recycle a jar that we can use to put sugar, candies or whatever they want.
Hola amigos de esta hermosa comunidad creativa!!! Espero que estén todos bien. Hoy quiero participar de esta iniciativa y para eso recicle un frasco que lo podemos usar para poner azúcar, caramelos o lo que quieran.
I did this work with a video tutorial by @ericaferrariporcelanafria that is on YouTube and the photos were taken with my Samsung Galaxy j4 cell phone.
Este trabajo lo hice con un video tutorial de @ericaferrariporcelanafria que está en YouTube y las fotos fueron sacadas con mi teléfono celular Samsung Galaxy j4.
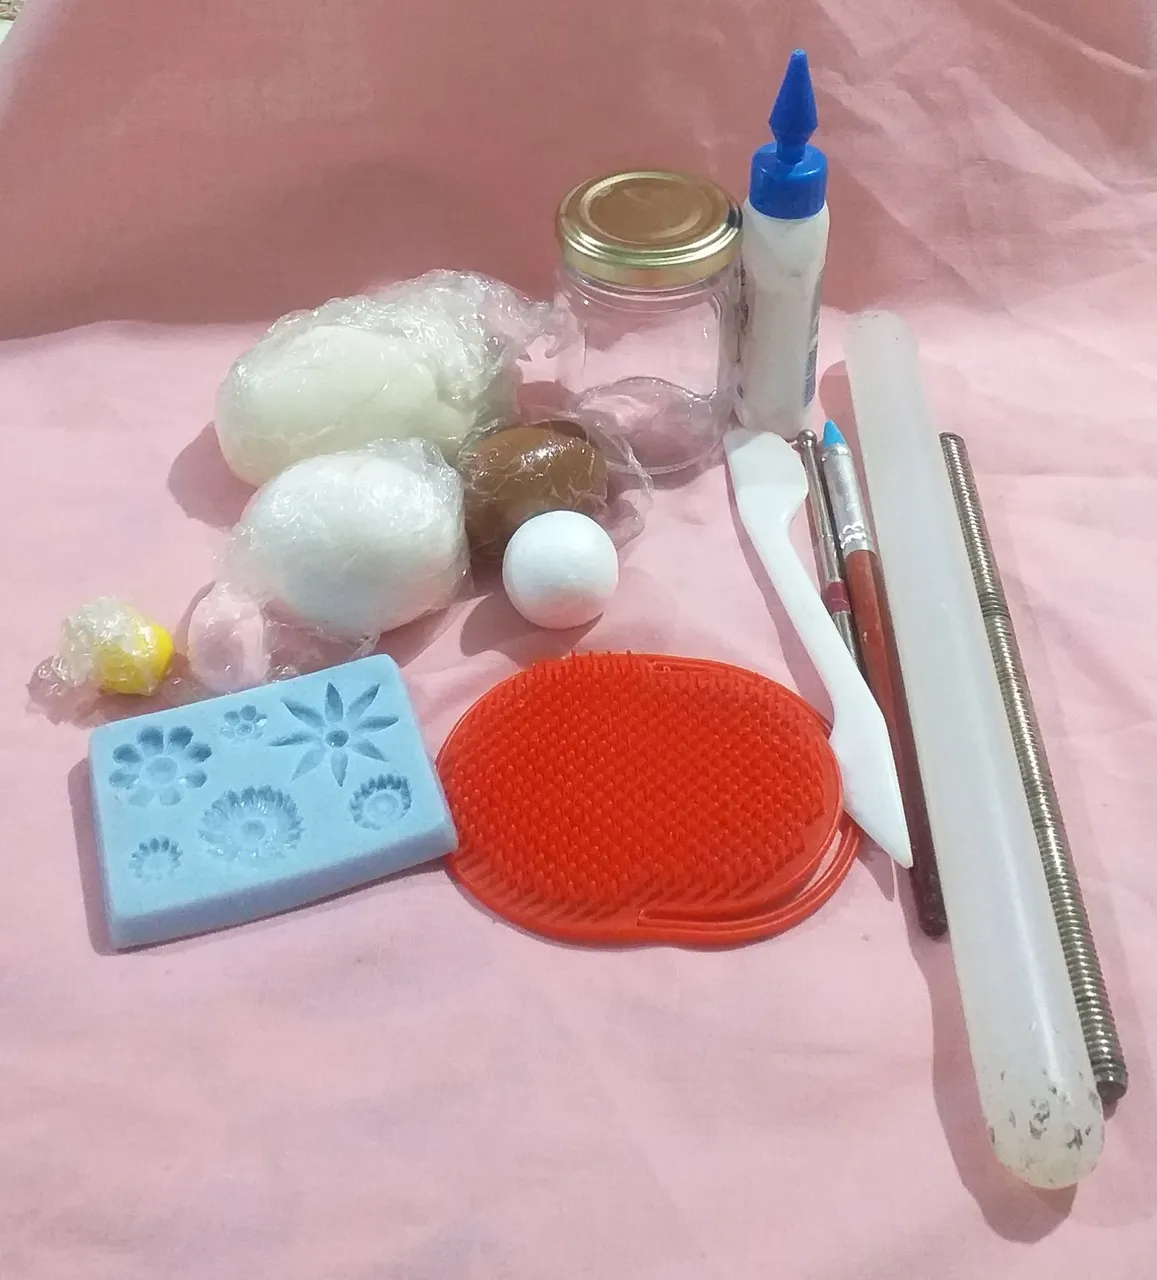
The materials I used are: cold porcelain (white, dark brown, yellow,butter and pink), vinyl glue, cuttings, rolling pin, a Styrofoam sphere, texturing rod, brush, flower mold,bar and two black pearls.
Los materiales que utilicé son: porcelana fría ( blanca, marrón oscuro, amarillo,manteca y rosado), cola vinilica, estecas, palo de amasar,una esfera de telgopor,varilla para texturar, cepillo,molde de flores,frasco y dos perlas negras.
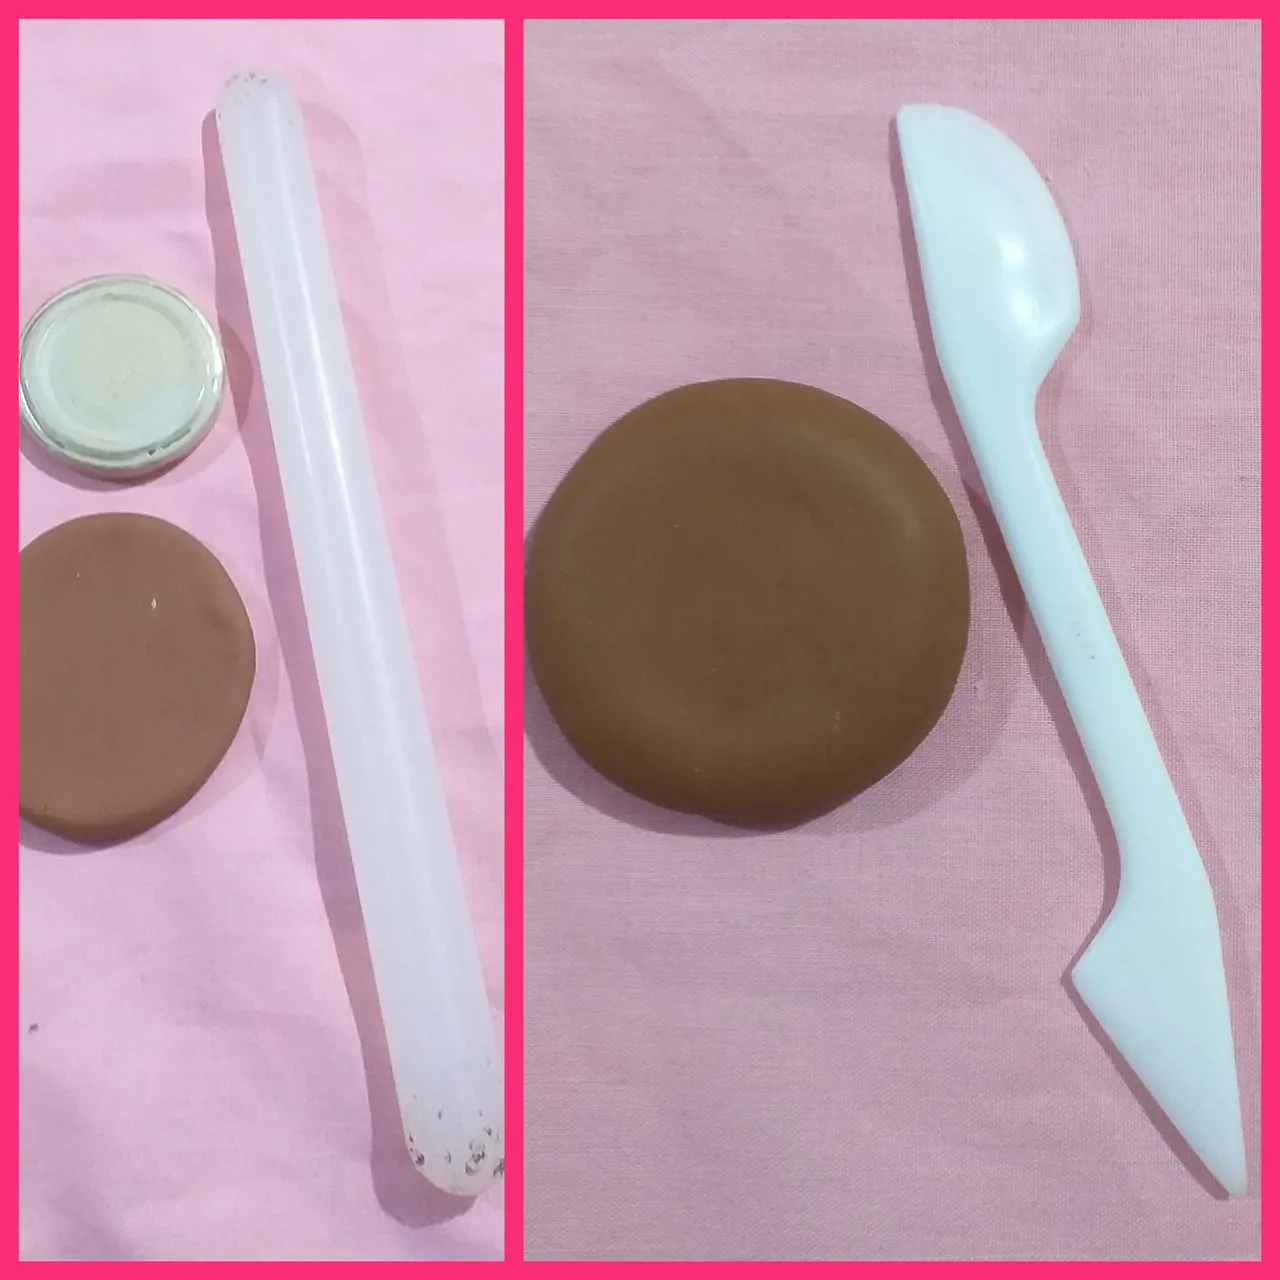
We put vinyl glue on the lid of the bottle, we stretch cold brown porcelain. We cover the entire lid and remove the excess.
Ponemos cola vinilica a la tapa del frasco, estiramos porcelana fría marrón. Cubrimos toda la tapa y quitamos el excedente.
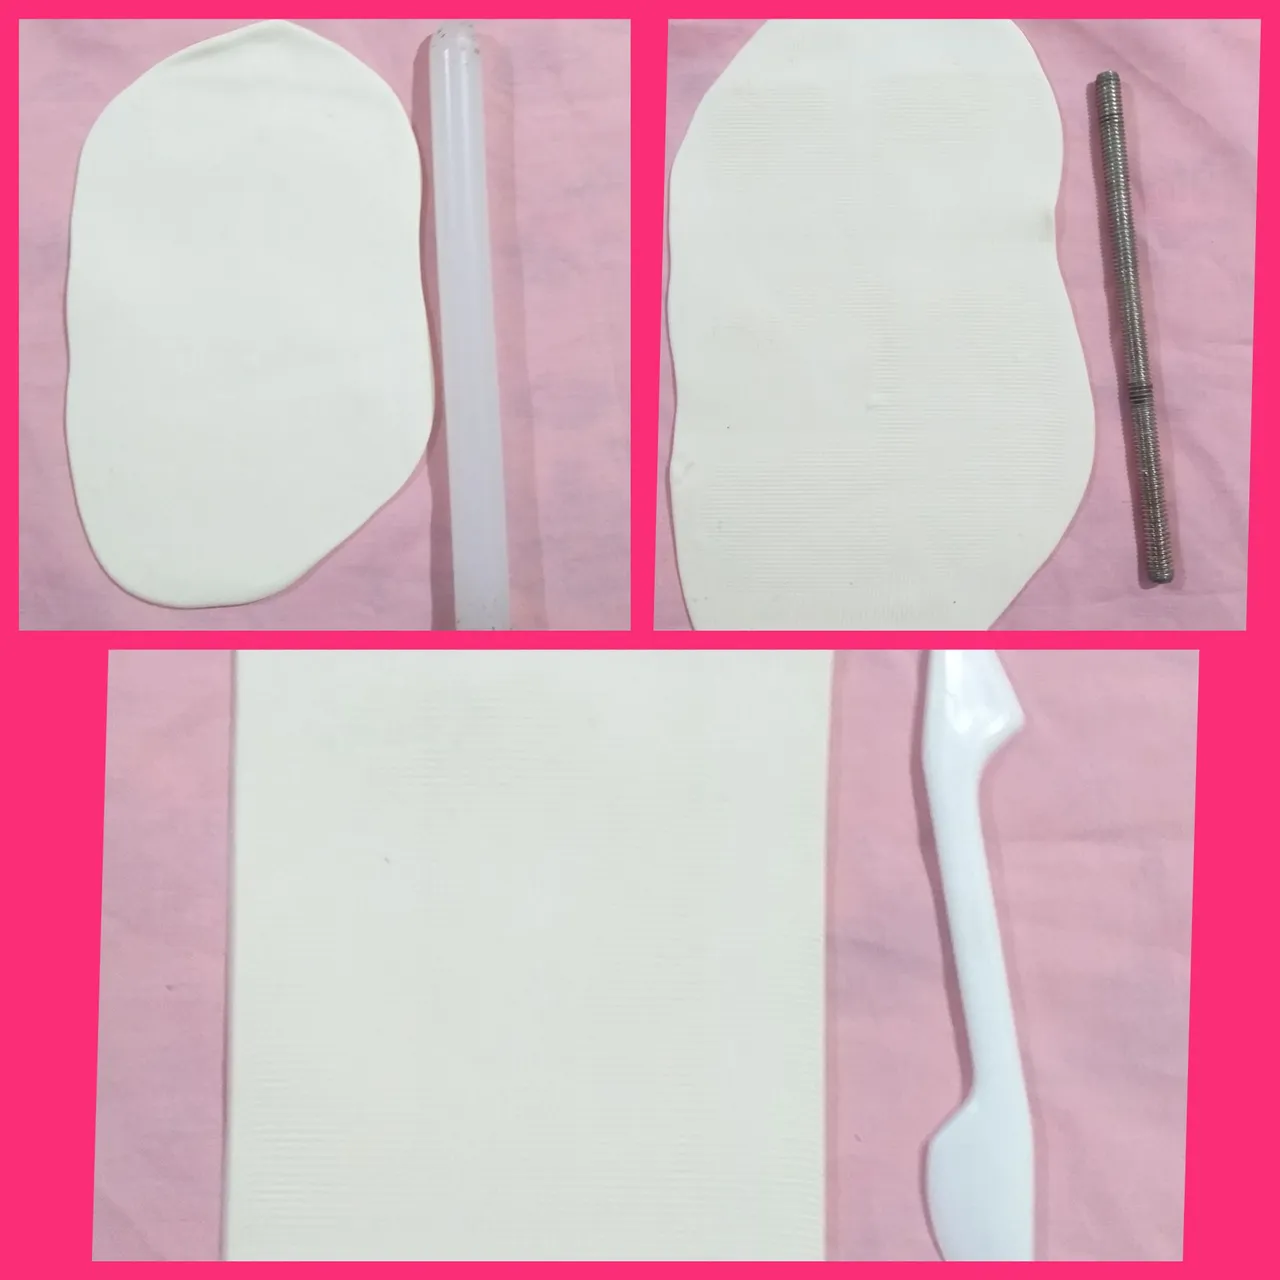
Stretch butter-colored cold porcelain, texture with the rod and cut into a rectangular shape (it must be twice the length of the jar).
Estiramos porcelana fría color manteca, texturamos con la varilla y cortamos en forma rectangular (tiene que ser el doble de largo del frasco).

We cover the jar with porcelain, join at the ends, match with scissors. In the four corners we make tips and fold at the top.
We stretch porcelain again, texture with the rod and cut in a rectangular shape. We glue in the upper part on the part that we fold.We decorate with one or more flowers.
Cubrimos el frasco con la porcelana,unimos en los extremos, emparejamos con una tijera. En las cuatro esquinas hacemos puntas y doblamos en la parte superior.
Estiramos nuevamente porcelana, texturamos con la varilla y cortamos en forma rectangular. Pegamos en la parte superior sobre la parte que doblamos. Decoramos con una o varias flores.
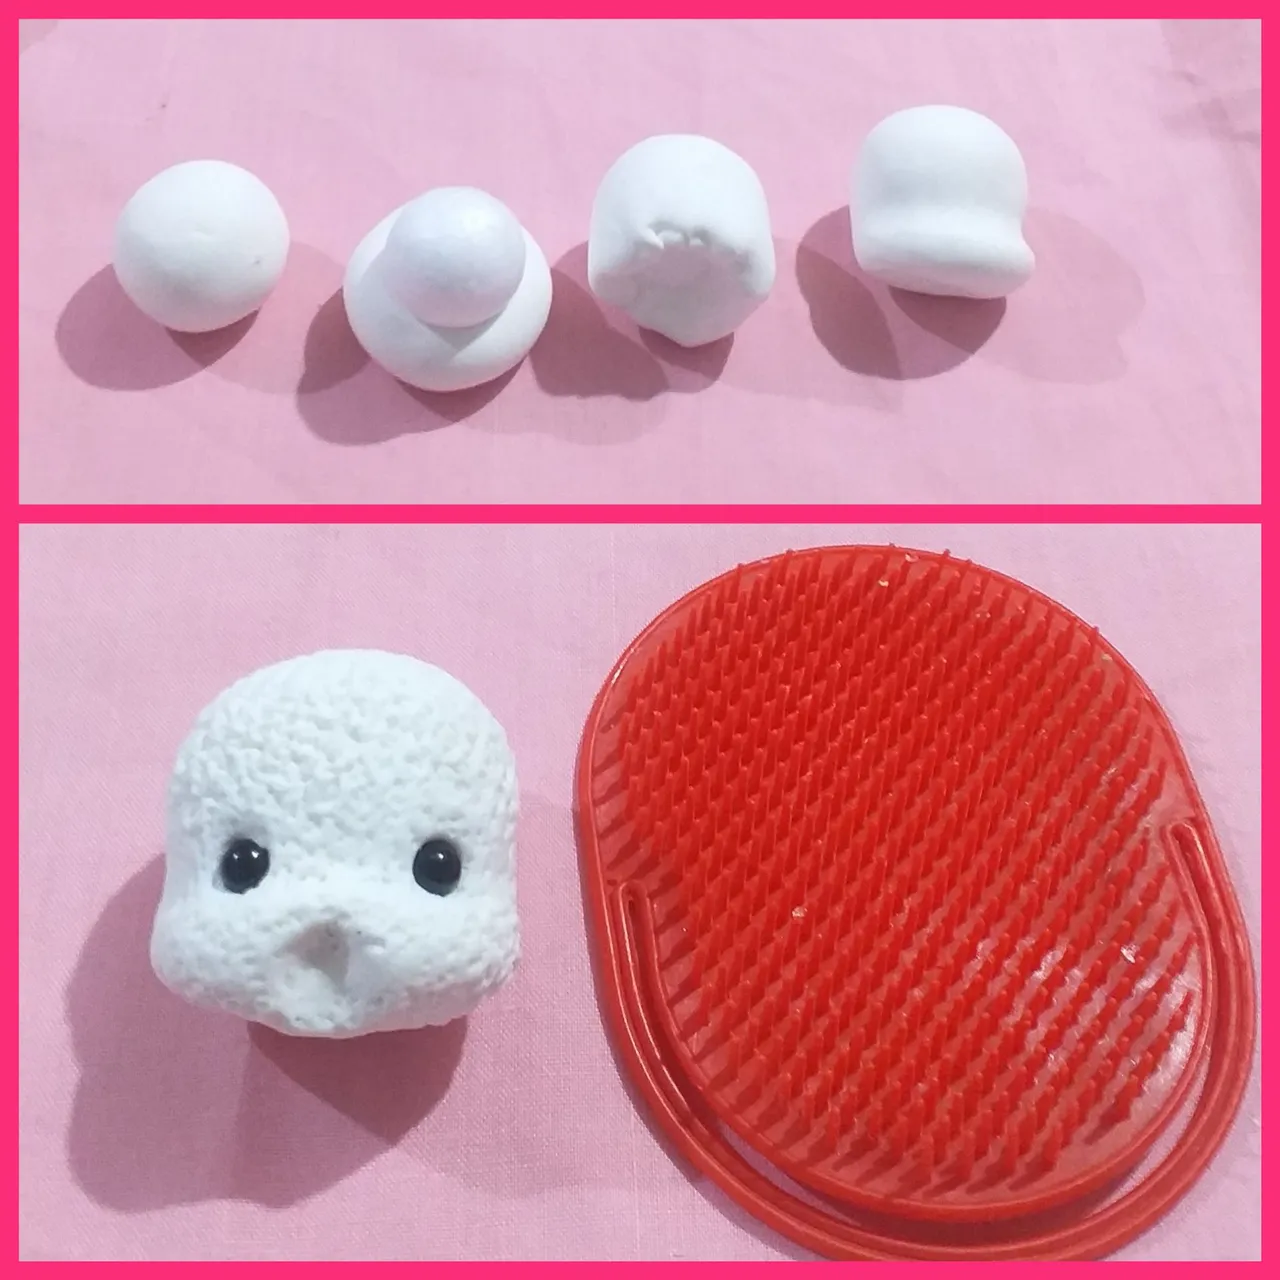
To make the head of the cow, we start from a ball, we introduce the styrofoam sphere, close it and mark the division of the forehead and the snout. We texture and hollow in the center of the nose. We put the black pearls in the place where the eyes go.
Para hacer la cabeza de la vaca partimos de una bolita, introducimos la esfera de telgopor cerramos y marcamos la división de la frente y el morro. Texturamos y ahuecamos en el centro del morro. Ponemos las perlas negras en el lugar donde van los ojos.
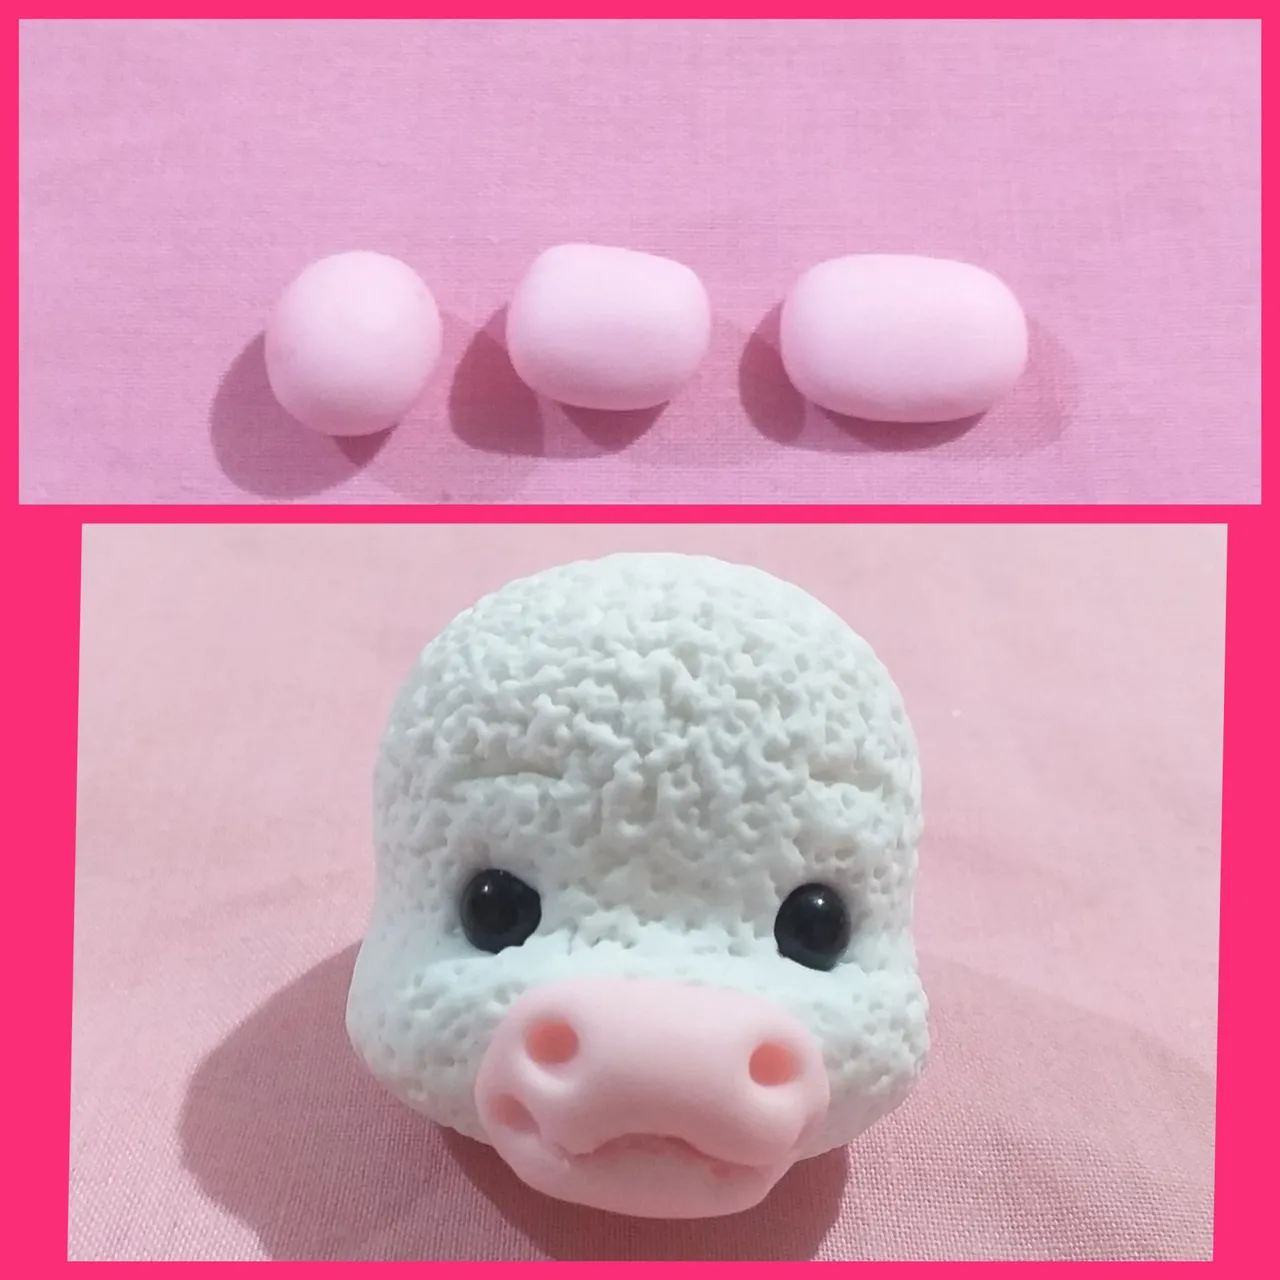
To make the nose, we start from a ball and give it an oval shape, flatten and glue.
Once glued we mark the mouth and the nostrils.
Para hacer el morro partimos de una bolita y le damos forma ovalada, aplanamos y pegamos.
Una vez pegado marcamos la boca y los orificios de la nariz.
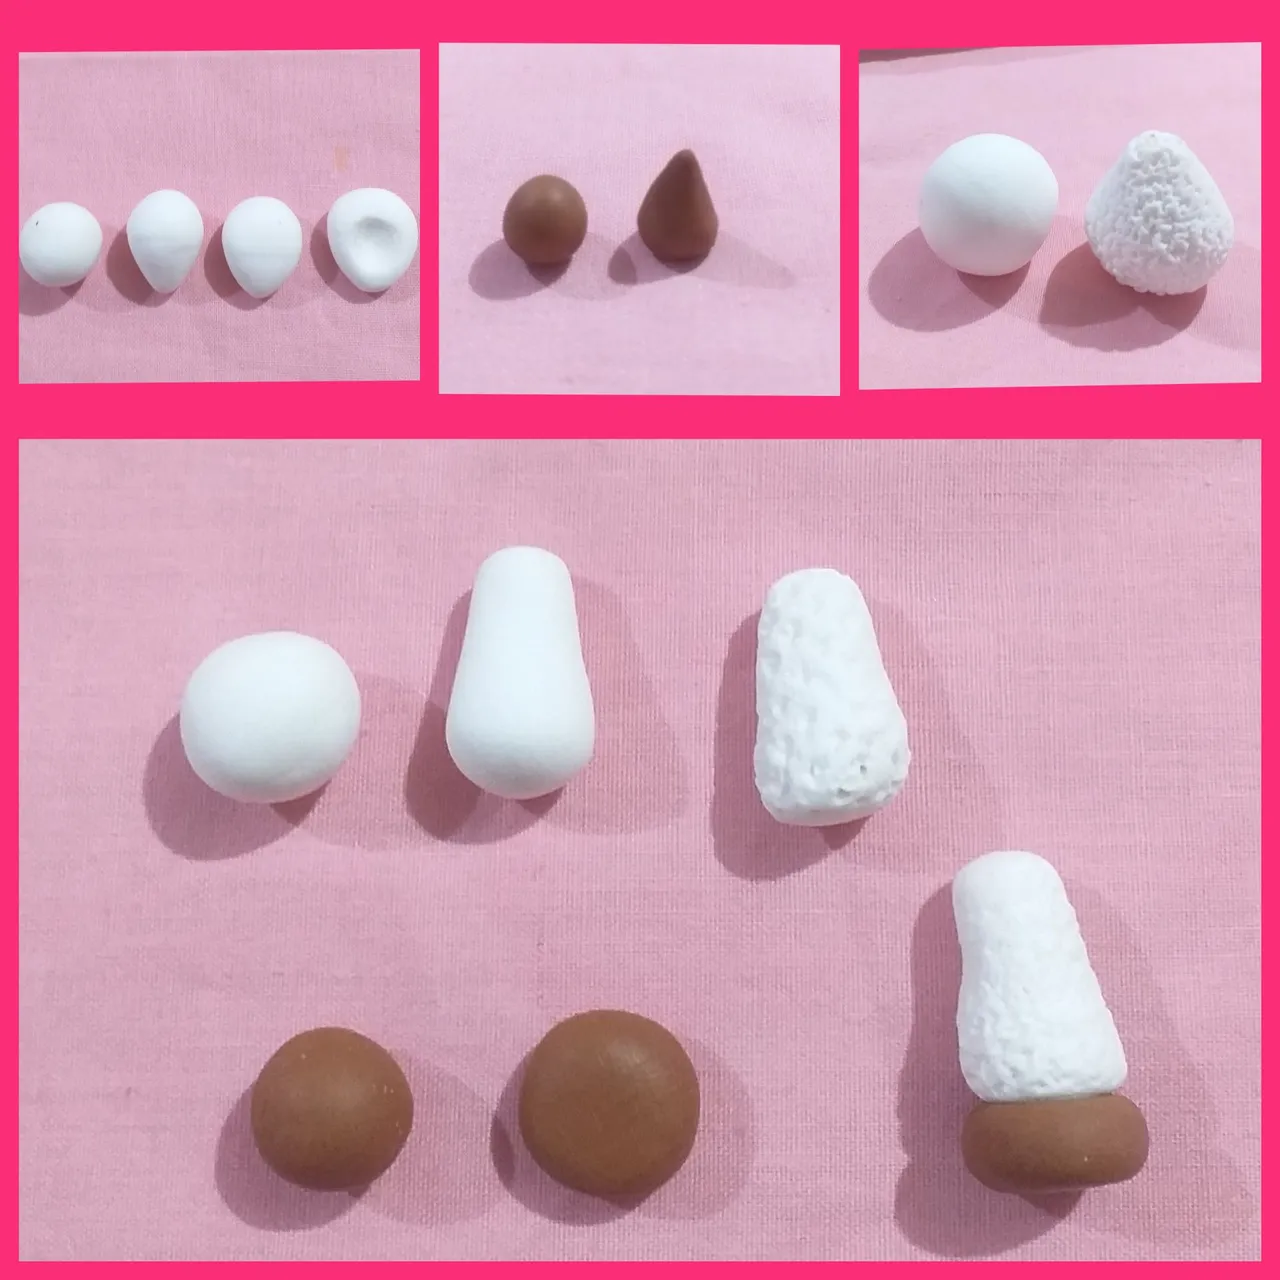
For the ears, we make two equal balls, we shape a short tear, flattened, we hollow and we texture.
For the horns we make two equal brown balls and we point them.
For the body we make a ball and we shape a short tear and texture.
For the legs we make two equal balls, we stretch leaving one part wider than the other and we texture.
For the hooves we make two equal brown balls and flatten. We glue the hoof to the leg.
Para las orejas, hacemos dos bolitas iguales, damos forma de lágrima corta,aplanados,ahuecamos y texturamos.
Para los cuernos hacemos dos bolitas iguales de color marrón y sacamos punta.
Para el cuerpo hacemos una bolita y damos forma de lágrima corta y texturamos.
Para las patas hacemos dos bolitas iguales, estiramos dejando una parte más ancha que la otra y texturamos.
Para las pezuñas hacemos dos bolitas iguales de color marrón y aplanamos. Pegamos la pezuña a la pata.
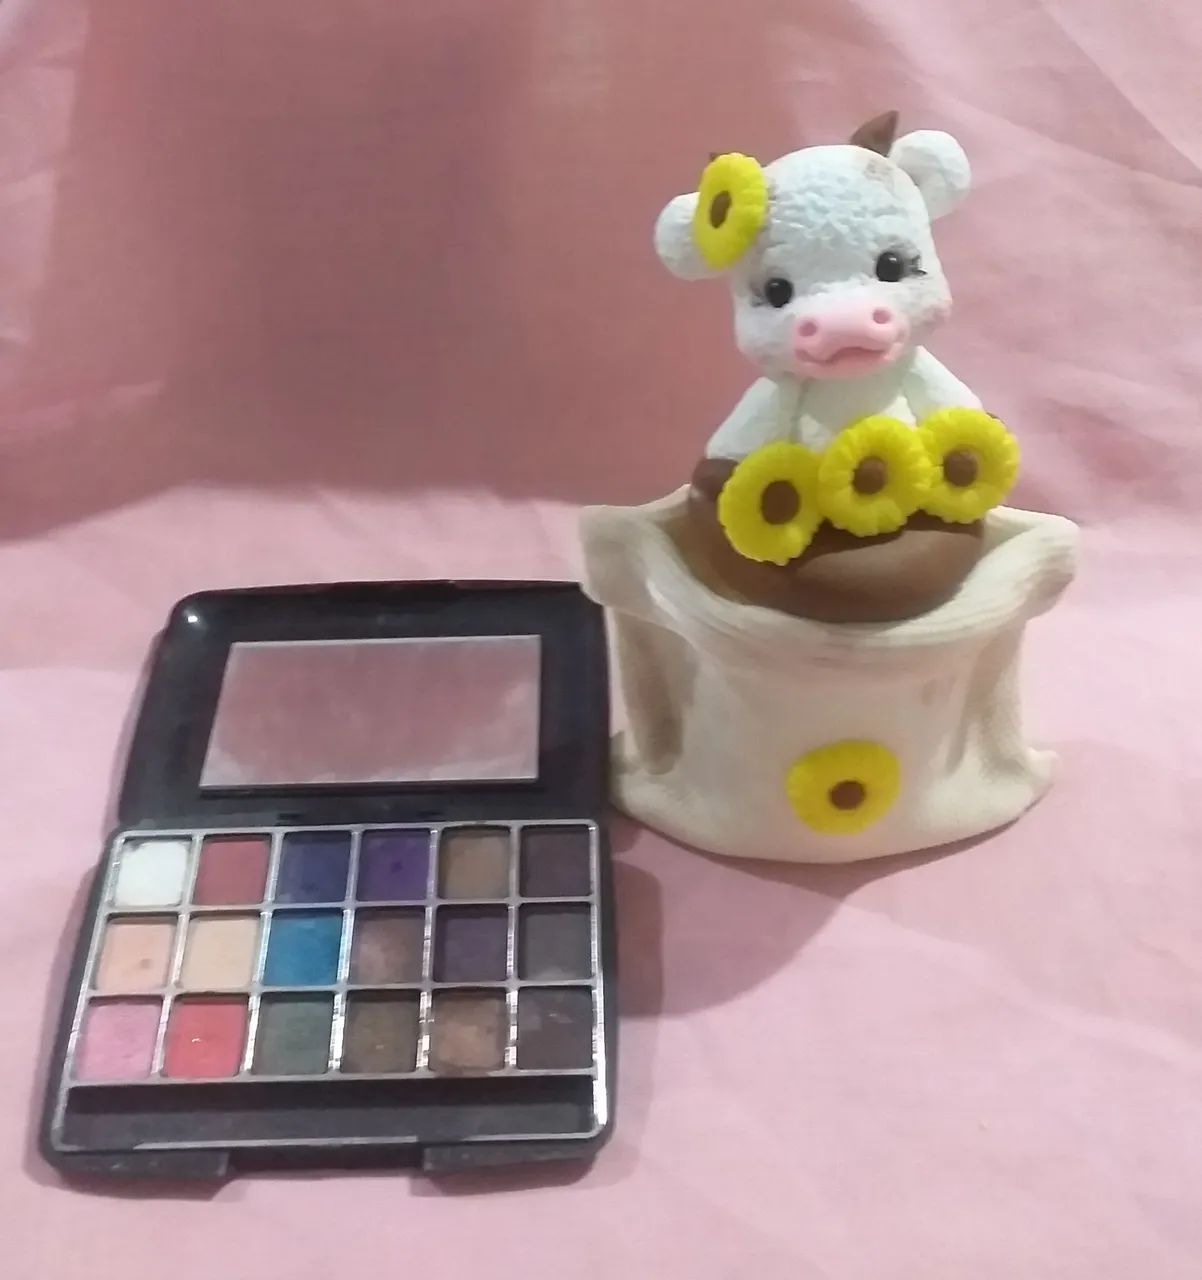
We join all the parts with vinyl glue, decorate with flowers and make up.
Unimos todas las partes con cola vinilica, decoramos con flores y maquillamos.
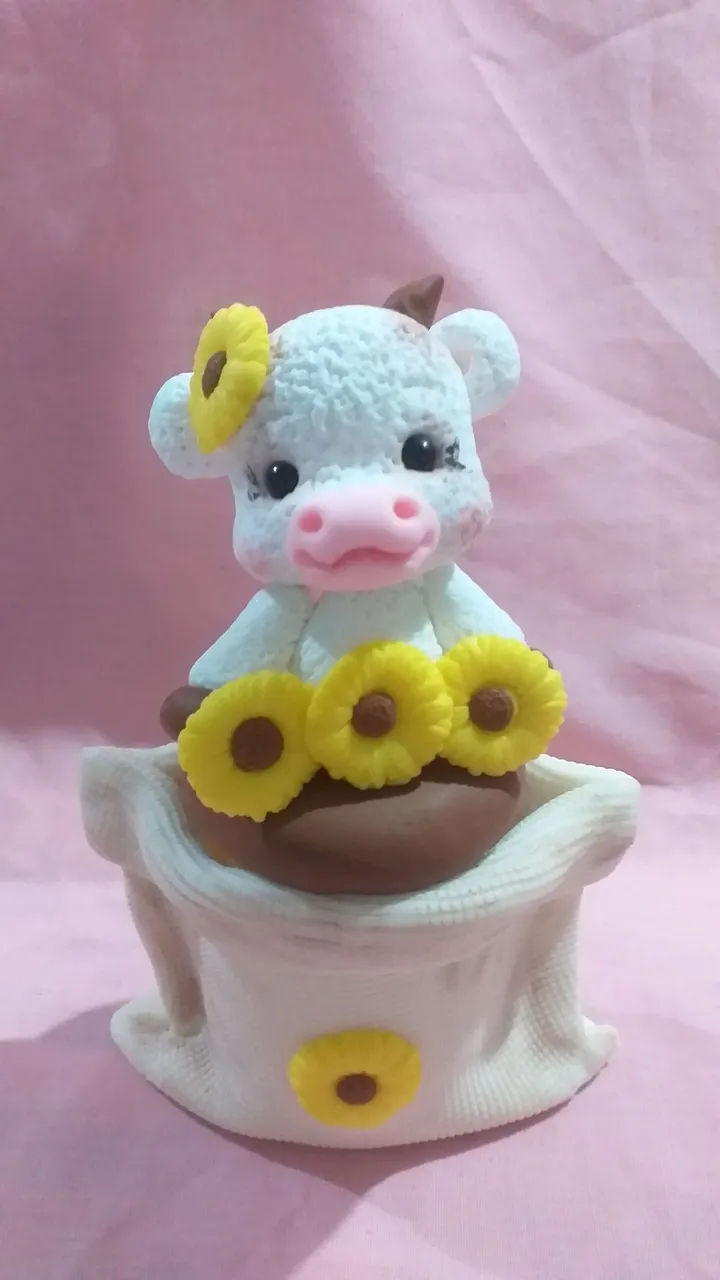
And so this beautiful bottle is finished to put whatever you want.
I worked with a tutorial from @ericaferrariporcelanafria from the YouTube platform, I used the Google translator and the photos were taken with my Samsung Galaxy j4 cell phone.
I hope you liked it as much as I did. Greetings. Andrea ♡♡♡
Y así queda terminado este hermoso frasco para poner lo que quieras.
Trabajé con un tutorial de @ericaferrariporcelanafria de la plataforma YouTube, utilicé el traductor de Google y las fotos fueron tomadas con mi teléfono celular Samsung Galaxy j4.
Espero les haya gustado tanto como a mi. Saludos. Andrea♡♡♡