
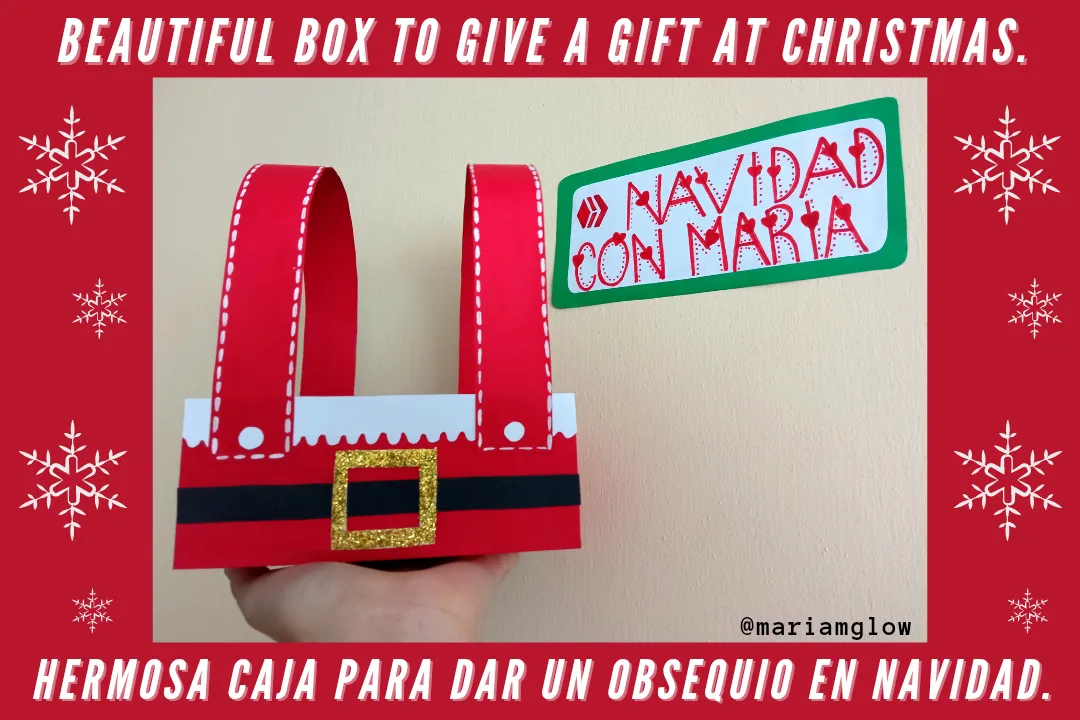
Espero estén muy bien, el día de hoy les traigo otro capítulo de mi serie navideña, en esta ocasión les enseñaré a realizar esta caja la cual es perfecta para dar un obsequio, espero que les guste mucho. A continuación el paso a paso:
🎅Capítulo anterior de "Navidad con María":
I hope you are very well, today I bring you another chapter of my Christmas series, this time I will teach you how to make this box which is perfect to give a gift, I hope you like it very much. Here is the step by step:
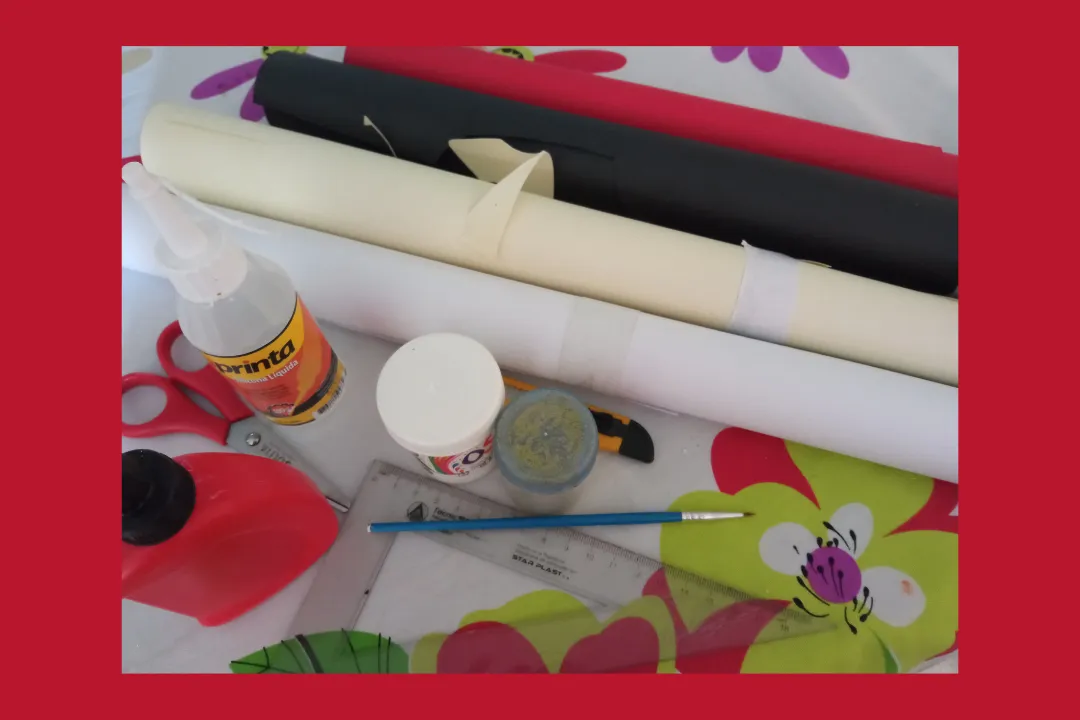
Materiales:
- Cartulina, colores: rojo, blanco, negro y amarillo.
- Tijera.
- Lápiz.
- Regla.
- Silicón.
- Pintura blanca.
- Pincel.
- Escarcha.
- Pega blanca.
- Cutter o exacto.
Materials:
- Cardboard, colors: red, white, black and yellow.
- Scissors.
- Pencil.
- Ruler.
- Silicone.
- White paint.
- Paintbrush.
- Frosting.
- White glue.
- Cutter.
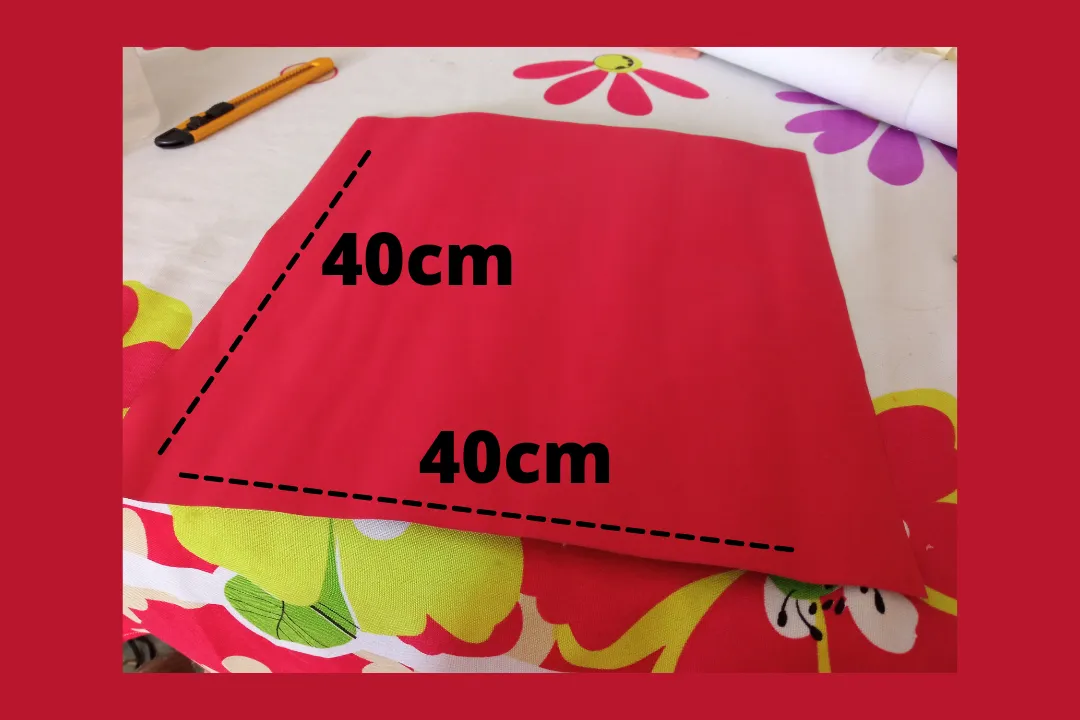
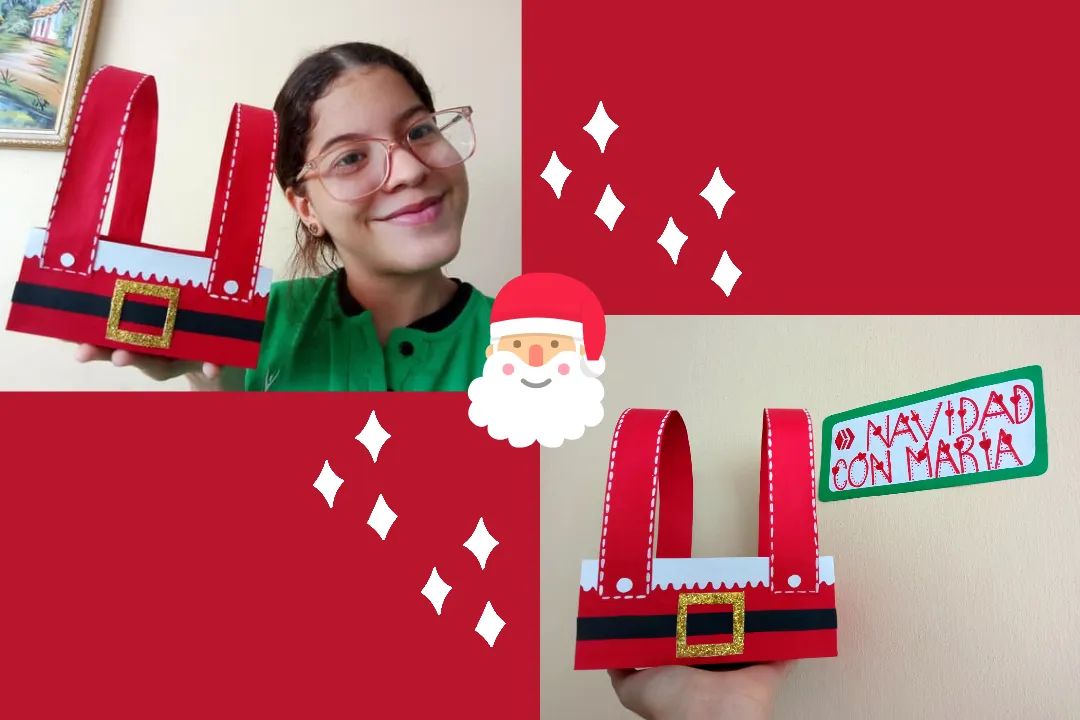
Primero, corté un cuadrado de cartulina roja con las medidas de 40 cm x 40 cm.
First, I cut a square of red cardboard measuring 40 cm x 40 cm.
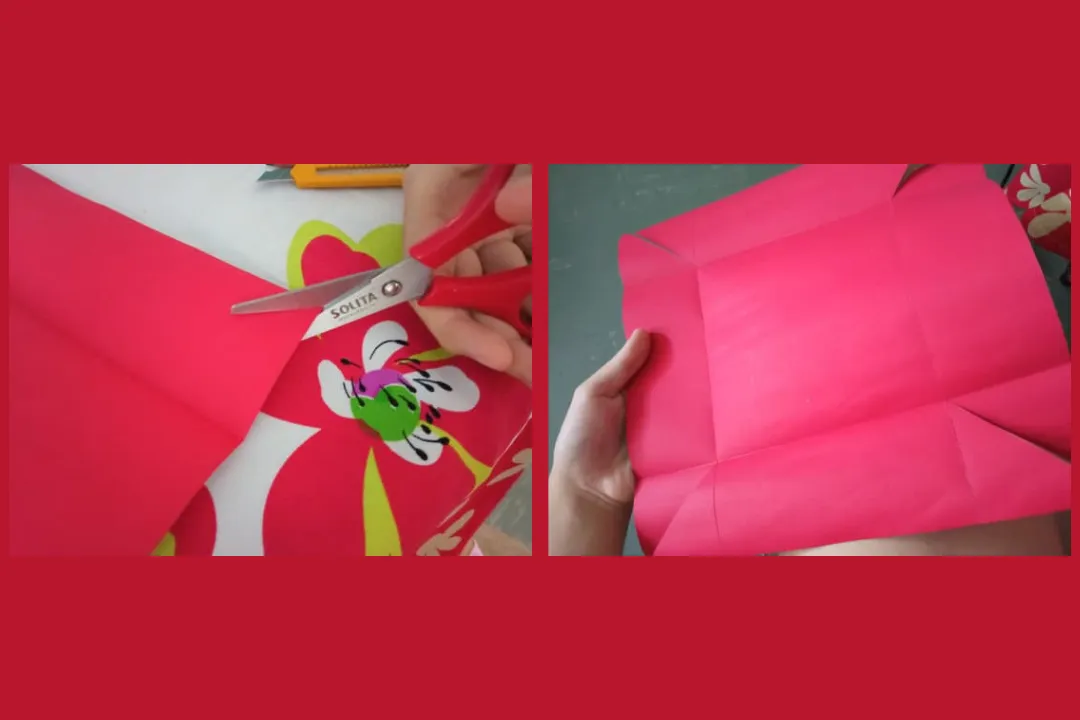
En cada lado medí 7 centímetros y marqué (como lo muestro en la primera imagen), luego, la parte del cutter que no funciona la pasé cuidadosamente por las líneas para lograr que se pudieran doblar los lados con mayor facilidad.
On each side I measured 7 centimeters and marked (as shown in the first image), then, the part of the cutter that does not work, I carefully passed it along the lines so that the sides could be folded more easily.
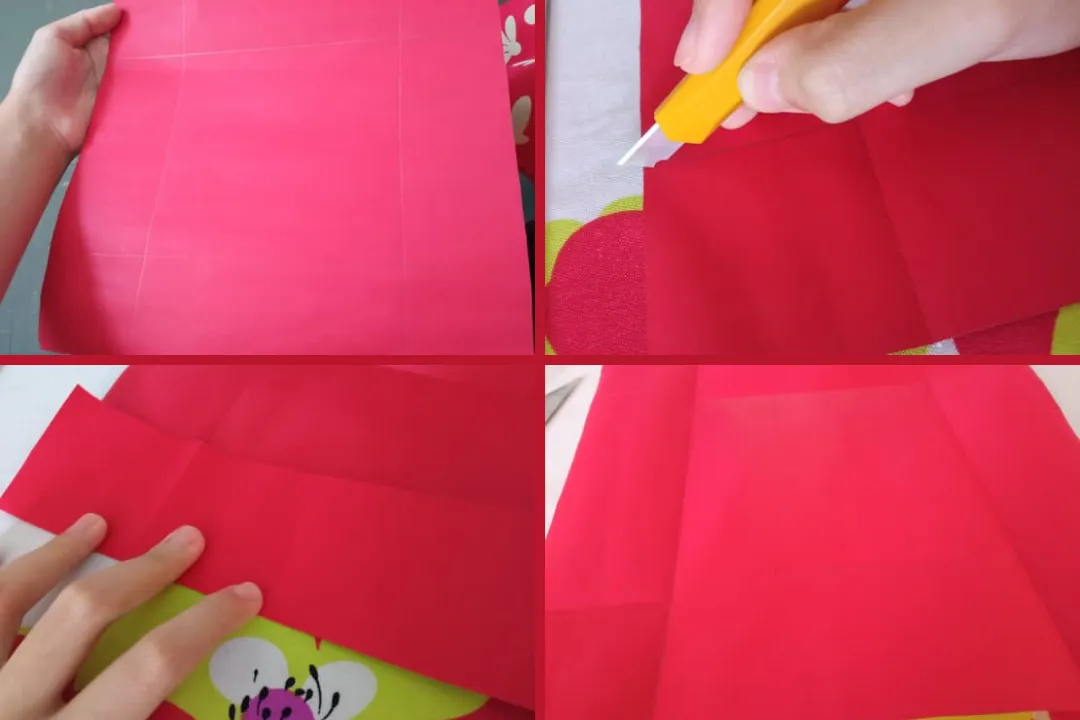
Después realicé un corte en cada esquina hasta donde se cruzaban las líneas.
I then made a cut at each corner up to where the lines crossed.
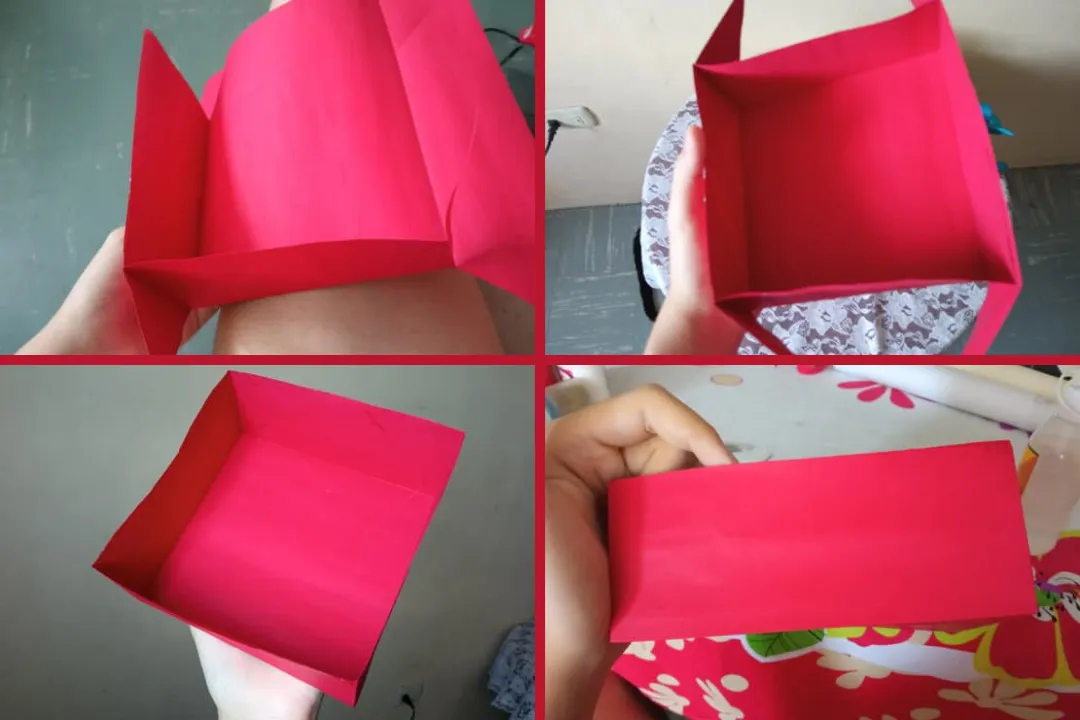
Luego pegué unas "pestañas" por dentro y las otras cuatro que sobraron las pegué por fuera, y listo.
Then I glued some "tabs" on the inside and the other four that were left over I glued on the outside, and that was it.
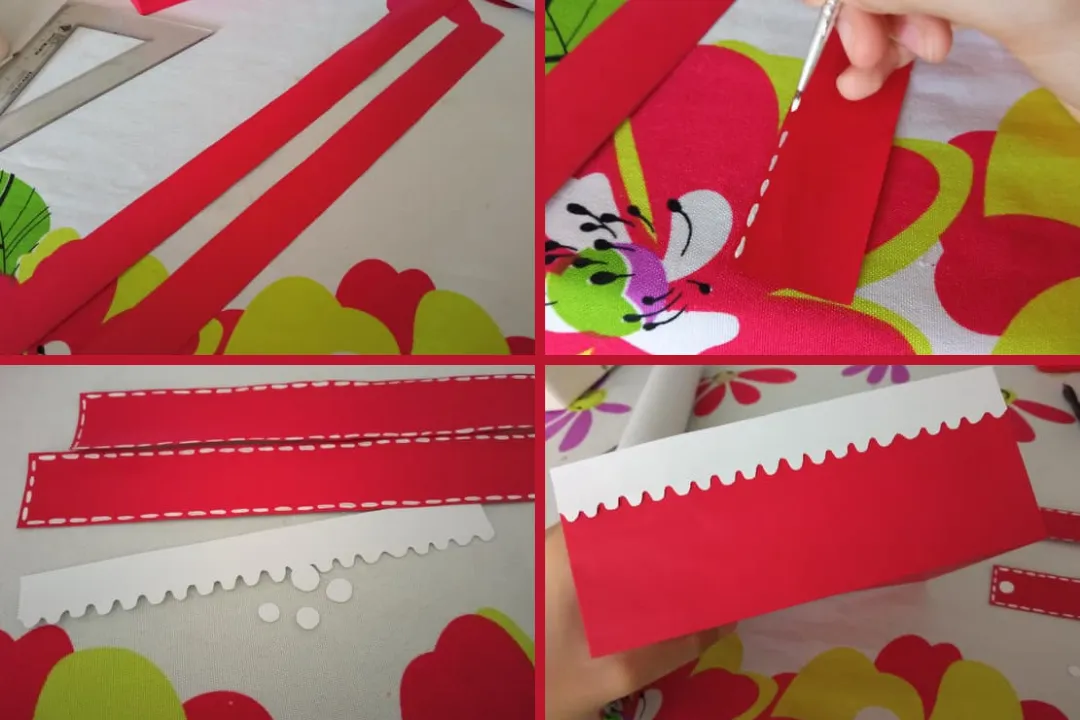
Corté dos tiras de cartulina roja, realicé algunos detalles con la pintura y cartulina blanca.
I cut two strips of red cardboard, made some details with paint and white cardboard.
Realicé y adherí los detalles finales, y listo!
I made and adhered the final details, and that's it!
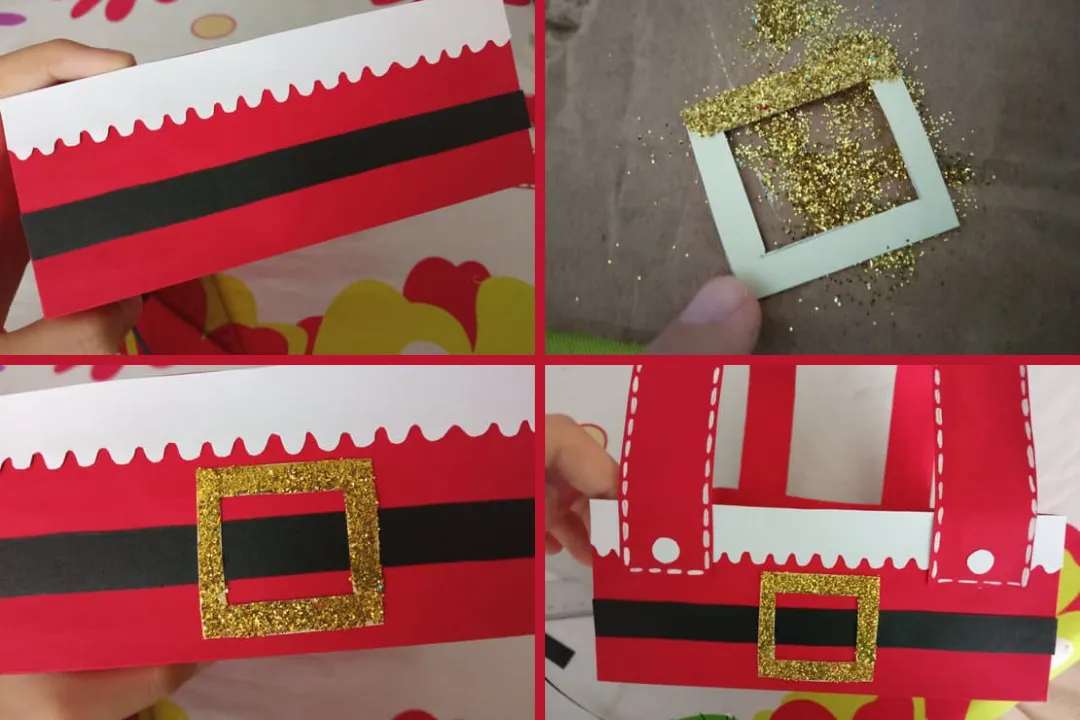
Este fue el resultado, espero que les haya gustado tanto como a mí, de verdad muchísimas gracias por leer mi post. Hasta una próxima oportunidad!!🎅🎁
This was the result, I hope you liked it as much as I did, thank you so much for reading my post. See you next time!🎅🎁
🎁Previous chapter of "Christmas with María":
Casita navideña. || Christmas house.

Todas las imágenes son de mi autoría @mariamglow, tomadas con mi teléfono Redmi 9, editadas en Canva, texto traducido en DeepL.
All images authored by me @mariamglow, taken with my Redmi 9 phone, edited in Canva, text translated at DeepL.